If you've ever pulled a homemade pizza out of the oven only to find the toppings are perfect but the center of the crust is a gummy, undercooked mess - you're not alone. That dreaded layer of raw, pasty dough hiding beneath your sauce (pizza makers call it the "gum line") is one of the most common problems in home pizza making.
The fix? Par-baking.
It's a simple technique that separates the pros from the amateurs, and once you understand how it works, you'll wonder why you didn't start doing it sooner. In this guide, I'll break down exactly how to par bake pizza crust, how long to par bake pizza crust depending on your setup, and when par-baking is the right move versus when you should skip it entirely.
What Is Par-Baked Pizza?
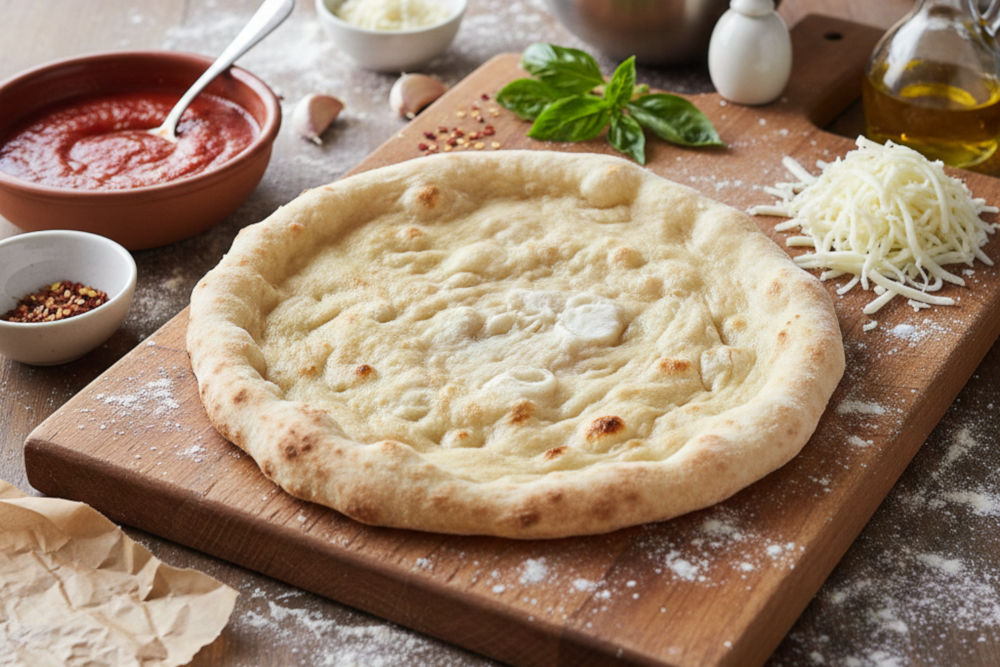
Par-baking means partially baking your pizza dough before you add any toppings. You're giving the crust just enough heat to set its structure - the yeast dies off, the gluten and starch firm up, and the surface dries out - but you pull it before it takes on any real color. The result is a blond, firm crust that's no longer raw but isn't finished either.
Why does this matter? Because in a typical home oven maxing out around 500–550°F, your cheese and toppings finish cooking long before your crust has a chance to fully bake through. Professional pizza ovens blast dough at 800°F+ and cook a pizza in 90 seconds. Your home oven can't do that. Par-baking bridges that gap by giving the crust a head start.
When you add toppings to a par-baked crust and do the final bake, the oven only needs to melt the cheese, heat the sauce, and finish browning the crust. The structural work is already done.
The bottom line: par-baking creates a moisture barrier on the dough's surface that prevents sauce from soaking in, eliminates the gum line, and gives you a crisper, more evenly cooked pizza every single time.
When Should You Par Bake (and When Should You Skip It)?
Par-baking isn't always necessary, and knowing when to use it is just as important as knowing how. Here's the breakdown:
Par-baking is a great idea when:
- You're using a conventional home oven without a pizza stone or steel
- Your toppings are heavy or high-moisture (think fresh mozzarella, roasted vegetables, or multiple meats)
- You're making thick-crust, Sicilian, or Detroit-style pizza (more on this below - it's basically mandatory)
- You're batch-prepping pizzas for a party or freezing crusts for later
- You're working with gluten-free dough, which almost always needs a par-bake to avoid being gummy
- You're grilling pizza or using an air fryer
You can probably skip it when:
- You're baking on a preheated pizza steel or stone at 500°F+ with a thin crust and light toppings
- You're using a dedicated pizza oven (Ooni, Gozney, etc.) at full temperature
- You're making a simple Neapolitan-style pie with minimal toppings that will cook quickly
Even in cases where you could skip it, par-baking gives you an insurance policy. It's never going to hurt your pizza - it just adds an extra step.
How to Par Bake Pizza Crust: Step by Step
Here's the basic method that works for most styles. I'll get into style-specific variations after this.
1. Prep Your Dough
Pull your dough from the fridge at least 1.5 to 2 hours before you plan to stretch it. Cold dough fights back - letting it come to room temperature makes it pliable and much easier to work with. If you're using the PizzaLogic Dough Calculator to dial in your recipe, you've already got your hydration and yeast levels dialed, so this step is just about tempering.
2. Stretch to Your Desired Thickness
For a standard round pizza, stretch or roll your dough to about ¼ inch thick. For thin and crispy styles, go thinner. For pan pizzas, press the dough into your oiled pan and let it proof (I'll cover that process in detail below).
3. Dock the Dough
This is a step you wouldn't want to normally use with most pizza styles, but can give you a more workable surface when par-baking. When you bake "naked" dough without the weight of sauce and cheese holding it down, trapped gases create massive air bubbles that warp the crust and cause uneven cooking.
Take a fork and prick the entire surface of the dough evenly. This creates tiny steam vents that let gas escape without ruining the crust's shape. A dough docker (a small roller with spikes) works even better if you have one.
One exception: thick-crust and pan-style pizzas generally don't need docking. The higher walls and denser crumb actually benefit from a more irregular, airy rise.
4. Oil and Season
Brush the surface and rim with a thin coat of extra virgin olive oil. This does two things: it promotes better browning during the final bake, and it acts as a moisture sealant during the par-bake. A light pinch of flaky salt on the rim at this stage makes a noticeable difference in the finished crust.
5. Par Bake
Place your prepped dough in a preheated oven (temperature and time depend on your setup - see the chart below). You're looking for a crust that is firm to the touch, dry on the surface, and pale blond in color. There should be no remaining raw or shiny-wet dough visible.
6. Cool Completely Before Storing
If you're topping and finishing right away, let it cool for just a few minutes. But if you're storing or freezing your par-baked crusts, this step is critical - I'll cover it in the storage section below.
How Long to Par Bake Pizza Crust (By Equipment)
The biggest variable in par-baking is your heat source. Here's a quick reference for the most common home setups:
Conventional oven on a sheet pan: 450°F for about 7 minutes. The crust will puff up and feel firm but remain pale.
Conventional oven on a pizza stone or steel: 450–500°F for 3 to 5 minutes. The superior heat transfer from stone or steel sets the crust faster. If you're using a baking steel, lean toward the shorter end - steel conducts heat roughly 20 times better than stone, so things move fast.
Convection oven: 400°F for 4 to 8 minutes. The fan circulation gives you more even results, but drop the temp about 25–50°F compared to a standard oven.
Air fryer: 375–400°F for 1 to 3 minutes. Air fryers are essentially small, powerful convection ovens. The crust sets quickly, so keep a close eye on it.
Outdoor pizza oven (Ooni, Gozney, etc.): 750–850°F for just 30 to 60 seconds. At these temperatures the structure sets almost immediately. You're just looking for the dough to firm up with minimal color.
Indoor grill (Ninja Foodi, etc.): 390°F for about 3 minutes. The surface should look dry and no longer feel supple.
The visual cue matters more than the timer. Every oven is different. You want the crust firm and dry but still pale - no golden brown yet. That color comes during the final bake.
Your Baking Surface Makes a Bigger Difference Than You Think
The material sitting under your dough has a huge impact on how your par-bake turns out.
Sheet pan (aluminum): The most accessible option. Aluminum has low thermal mass, so it doesn't store or transfer much heat. You'll get a softer bottom, which can actually be an advantage during par-baking since it prevents the bottom from over-browning before the top sets. Great for beginners.
Pizza stone (cordierite): Mimics the floor of a brick oven - absorbs and radiates heat evenly while wicking away moisture from the dough. Needs a 45–60 minute preheat to be fully saturated with heat, and takes a while to recover between bakes.
Baking steel: The game-changer for home pizza. Steel transfers heat to the dough almost instantly, creating aggressive oven spring and setting the crust structure in as little as 3 minutes. It recovers heat quickly between bakes too, making it ideal for pizza parties. If you're serious about home pizza and don't have a steel yet, it's the single best equipment upgrade you can make. (I go deeper on this in my guide to pizza steels.)
Perforated pizza pan: A middle-ground option. The holes allow airflow to the bottom of the crust, giving you better browning than a solid sheet pan without requiring the long preheat of a stone.
Par-Baking Pan Pizzas: Sicilian, Detroit, and Thick-Crust Styles
If you're making thick-crust pizza in a pan - whether that's Sicilian, Detroit-style, or grandma-style - par-baking isn't optional. It's a fundamental part of the process. These doughs are so thick that they simply won't cook through if you load them with sauce, cheese, and toppings from the start.
The Pan Pizza Par-Bake Process
Prep the pan: Generously oil your pan - about 2 to 3 tablespoons of olive oil (or a blend of olive oil and a neutral oil for Detroit-style). This oil isn't just for non-stick purposes. It fries the bottom and edges of the dough during baking, creating that incredible crispy, golden undercarriage that defines great pan pizza.
Press and proof: Press your dough into the oiled pan, stretching it to fill the corners. If it springs back, let it rest 15 to 20 minutes and try again. Once it fills the pan, cover it and let it proof at room temperature for 2 to 4 hours, until the dough is visibly bubbly and has risen to fill the pan. Don't rush this step - the proof is what gives pan pizza its signature light, airy interior.
Par-bake at 500°F for 8 to 10 minutes. The dough should rise fully and set its structure. The top will look dry and the crust will feel firm when you press it gently.
The de-pan trick (this is huge): As soon as the par-bake is done, carefully remove the crust from the pan and set it on a wire cooling rack or screen. If you leave it in the hot pan, the trapped steam will make the bottom soggy - undoing all the crispy, fried goodness you just created. Let the steam escape for a few minutes.
Top and finish: Return the par-baked crust to the pan (add a little more oil to the pan for extra crispness). Add your sauce, cheese, and toppings. For Detroit-style, run your Wisconsin brick cheese or similar right up to the edges so it melts down the sides and creates that signature frico crust. Bake at 500°F for another 8 to 12 minutes until the cheese is bubbly and the edges are deeply caramelized.
Why This Matters for Thick Crusts
Without the par-bake, thick-crust pizzas almost always end up with a raw, doughy center - even if you bake them for a long time. The weight of the toppings compresses the dough and traps moisture, preventing heat from penetrating to the middle. The par-bake ensures the interior crumb is fully set before any of that weight goes on top.
The de-panning step is what separates good pan pizza from great pan pizza. It's a technique straight from professional pizzerias, and it takes about 30 seconds of extra effort for a dramatically better result.
How to Cook a Par-Baked Pizza (The Final Bake)
Whether you par-baked your crust 10 minutes ago or pulled it from the freezer, the final bake follows the same principles.
Preheat aggressively. Get your oven as hot as it goes - 500°F minimum, 550°F if your oven allows it. If you're using a stone or steel, give it at least 45 minutes to fully preheat.
Top with restraint. One of the biggest mistakes in home pizza is overloading the toppings. A par-baked crust gives you a sturdier platform, but it's not invincible. Keep the sauce thin, don't drown it in cheese, and remember that toppings release moisture as they cook.
Bake for 8 to 12 minutes for thin to medium crusts, or 10 to 15 minutes for thick crusts. You're looking for melted, bubbly cheese with some spots of caramelization, and a golden-brown crust with good color on the bottom.
Check the bottom. Lift the pizza with a spatula and peek. The bottom should be golden brown and feel crisp, not pale and soft. If the top is done but the bottom needs more time, move the pizza to a lower rack for the last minute or two.
How to Store Par-Baked Pizza Crust
Getting the storage right is just as important as the par-bake itself. Mess this up and you'll end up with soggy, freezer-burned crusts that defeat the whole purpose.
Cooling (Don't Skip This)
The single most common mistake: wrapping a warm crust. A hot par-baked crust is still releasing steam. If you seal that moisture inside plastic wrap, it condenses, turns the crust soggy, and creates ice crystals that cause freezer burn.
Set your par-baked crusts on a wire cooling rack and leave them alone for at least an hour until they're completely at room temperature. The surface should feel dry, not warm or damp.
Short-Term Storage (Fridge)
If you're using the crusts within a week, wrap them tightly in plastic wrap and store in the refrigerator. They'll hold well for about 7 days. Keep them away from strong-smelling foods - pizza crust absorbs odors easily.
Freezing Par-Baked Crusts
For longer storage (up to 2 to 3 months), double-wrap the completely cooled crusts:
- First layer: Wrap tightly in plastic wrap, pressing out as much air as possible
- Second layer: Wrap in aluminum foil, or slide into a heavy-duty freezer bag
- Label with the date - you'll thank yourself later
When you're ready to use a frozen par-baked crust, let it thaw at room temperature for 20 to 30 minutes before topping and doing the final bake. You don't need to fully thaw it - just enough to take the deep chill off so it bakes evenly.
Par-Baking and Freezing: The Ultimate Meal Prep Move
Here's where par-baking really shines for the home pizza maker who likes to plan ahead. If you're already making dough for pizza night, make a double or triple batch. Par-bake the extras, cool them, wrap them, and stock your freezer.
This gives you something genuinely better than any store-bought frozen pizza: a crust made from your own recipe, with your preferred hydration and fermentation, ready to go from freezer to table in under 30 minutes. It's the best of both worlds - the quality of homemade dough with the convenience of frozen.
If you're already freezing pizza dough balls (which is a great strategy on its own), consider par-baking as an alternative that trades a small amount of spontaneity for a huge gain in convenience. Frozen dough balls need to thaw and come to room temperature before you can stretch and bake them - that's a 2+ hour process. Par-baked frozen crusts skip all of that. Thaw for 20 minutes, top, bake, eat.
When to freeze raw dough vs. par-baked crusts:
- Freeze raw dough when you want maximum flexibility with shape and thickness, and you don't mind the thaw time
- Freeze par-baked crusts when you want the fastest possible path from freezer to finished pizza, and you've already decided on your crust style and size
Both methods preserve quality well for 2 to 3 months in a standard home freezer.
Par-Baking in an Air Fryer
Air fryers are essentially compact convection ovens, and they work surprisingly well for personal-sized par-baked pizzas. There's one quirk to know about: the powerful fan can distort raw dough and blow lightweight toppings around.
The move is to par-bake first at 375–400°F for about 3 minutes, just until the surface is set and the bottom has started to firm up. Then flip the crust over, add your toppings to the now-cooked side, and finish for another 4 to 6 minutes.
This "flip method" ensures both sides get good heat exposure and you end up with a crisp bottom - something that's surprisingly hard to achieve in an air fryer without it.
Par-Baking on the Grill
Grilled pizza is incredible, but grilling raw dough with toppings on it is a recipe for a burnt bottom and raw toppings. Par-baking on the grill solves this completely.
Place your stretched dough directly on the grill grates over medium-high heat. Cook for 2 to 3 minutes until you see grill marks and the dough firms up. Pull it off the grill, flip it over, and add your toppings on the grilled side - that's the side that's already sealed and cooked. Return to the grill, close the lid, and cook for another 3 to 5 minutes until the cheese melts and the bottom finishes.
The key insight here: the side touching the sauce is the one that was already par-baked, so it won't turn gummy.
Par-Baking Gluten-Free Pizza Crust
If you're working with gluten-free dough, par-baking goes from "nice to have" to "absolutely essential." Without the elastic gluten network that wheat dough relies on, gluten-free doughs are more like thick batters. They need a longer, more thorough par-bake to gelatinize the alternative starches (tapioca, rice flour, etc.) and create a base that can actually support toppings.
Par-bake gluten-free crusts at 450°F for 8 to 13 minutes - significantly longer than wheat-based dough. Use parchment paper to prevent sticking. Some bakers get great results by flipping the crust over for the last 2 to 3 minutes of the par-bake to make sure the bottom is fully set and crisp.
The goal is a crust that feels sturdy and dry on both sides. If it still feels soft or flexible in the middle, give it more time. A properly par-baked gluten-free crust will hold up to toppings and deliver a satisfying crunch that's otherwise very difficult to achieve.
High-Altitude Par-Baking Tips
If you're baking at elevation (roughly 3,500 feet and above), the lower atmospheric pressure changes how your dough behaves in ways that directly impact par-baking.
The main issues: Yeast produces CO2 that expands faster at altitude because there's less atmospheric pressure holding the dough down. Dough rises in roughly half the normal time, but the rapid rise often creates a weaker gluten structure with large, fragile air pockets that collapse during baking. On top of that, the dry air at altitude pulls moisture from your dough faster, and water boils at a lower temperature, so the crust can dry out and toughen before it's properly set.
What to adjust:
- Reduce yeast by about 25% to slow down fermentation and build a stronger gluten structure
- Increase hydration by about 5% to compensate for the drier flour and faster evaporation
- Consider a slightly higher par-bake temperature (around 460–475°F) for the first few minutes to set the structure quickly before too much moisture escapes, then reduce to finish
- Don't over-proof - watch your dough visually rather than relying on time. When it's doubled, it's ready, even if that happened faster than the recipe said it would
Troubleshooting Common Par-Bake Problems
Translucent, dark spots on the cooled crust: These look like oil spots but they're actually areas of structural collapse from under-baking. The proteins didn't fully set, so the air cells collapsed as the crust cooled, creating dense patches. Fix: lower your oven temp by 25°F and extend the par-bake time by 30 to 60 seconds for a more even set.
Crust shrinks away from the edges of the pan: This is especially common with Detroit-style. The gluten is too tight or the dough hasn't proofed long enough. Make sure your dough is at least 65–70% hydration, and let it proof in the pan for a full 3 to 4 hours before par-baking. Using a slightly lower protein flour (11–12.5% bread flour rather than 13–14% high-gluten pizza flour) also helps.
Massive air bubbles: Give docking a try. Prick the dough evenly with a fork before par-baking, and they'll deflate. If you're making thick-crust and want some bubbles but not giant ones, a lighter docking (fewer pricks, spaced further apart) gives you the best of both worlds.
Crust is tough or dry: You either par-baked too long or your oven runs hot. Use an oven thermometer to verify your actual temperature, and pull the crust at the first sign of firmness. Remember, you only want to set the structure - the crust shouldn't have any color yet.
Soggy after freezing: Almost always a cooling problem. The crust wasn't fully cooled before wrapping, so trapped steam condensed inside the packaging. Always cool on a wire rack for a full hour before wrapping.
The Bottom Line on Par-Baking
Par-baking is one of those techniques that sounds fussy until you try it - and then you can't imagine making pizza without it. For thick-crust and pan pizza styles, it's non-negotiable. For everything else, it's an incredibly reliable way to guarantee a crisp, fully-cooked crust regardless of your oven's limitations.
The core recipe is simple: par-bake your stretched (optionally: docked), oiled dough at 450°F for 3 to 7 minutes (depending on your baking surface), until it's firm and blond. Everything else - the storage, the style variations, the equipment choices - is refinement on top of that foundation.
Dial in your dough recipe with the PizzaLogic Pizza Dough Calculator, par-bake with confidence, and take your home pizza game to the next level.