No yeast? No problem - and honestly, no apologies needed either.
Maybe the packet in your fridge expired six months ago. Maybe you just don't feel like waiting three hours for a dough ball to do its thing. Whatever the reason, you can still make a pizza crust worth eating tonight. It won't taste exactly like a long-fermented Neapolitan dough - nothing will - but done right, a yeast-free crust is crispy, flavorful, and legitimately good on its own terms.
Here's how to do it properly. (And if you'd rather skip the dough-making entirely, I've also put together a guide on where to buy ready-made pizza dough balls - no judgment.)
What You'll Need
Before we get into the why, here's the what. A basic yeast-free pizza dough only needs a handful of ingredients you probably already have:
- All-purpose flour (not bread flour - more on that below)
- Baking powder (your leavening agent)
- Salt
- Olive oil
- Warm water (or beer, if you want bonus points)
- Sugar or honey (optional, for browning)
That's it. No proofing, no bulk fermentation, no overnight cold retard. Just mix, knead briefly, shape, and bake.
The Baseline Recipe: Baker's Percentages
One of the fastest ways to level up any pizza dough - yeast or not - is to stop measuring with cups and start measuring by weight. Baker's percentages make your results repeatable every single time, and they scale up or down effortlessly.
Here's a solid starting point for two 250g dough balls (roughly two 10–12" thin pizzas):
| Ingredient | Baker's % | Weight |
|---|---|---|
| All-purpose flour | 100% | 300g |
| Water (warm) | 55% | 165g |
| Olive oil | 5% | 15g |
| Baking powder | 4% | 12g |
| Salt | 2% | 6g |
| Sugar | 1.5% | 4.5g |
A few notes on these numbers: The hydration here (55%) is intentionally lower than most yeasted doughs. Quick doughs get sticky fast at higher hydrations because there's no long autolyse or fermentation to develop the gluten structure. If your dough is sticking to everything in sight, drop the water by 5–10g before adding more flour.
If you want to dial in the ratios for different ball sizes or a bigger batch, the PizzaLogic dough calculator makes it easy. It was built for fermented doughs, but the precision calibration - hydration, salt percentages, exact ball weights - works just as well when you're building a quick-rise recipe from scratch.
How Yeast-Free Leavening Actually Works
In a traditional dough, yeast feeds on sugars and produces carbon dioxide over several hours. That gas gets trapped in the gluten network and gives the crust its open, airy crumb. A yeast-free dough skips the biology entirely and relies on a chemical reaction to produce that same gas - just much, much faster.
You have two options:
Baking powder is the easier and more predictable choice. Most baking powder is double-acting, meaning it reacts once when it hits liquid and again when it hits oven heat (around 140°F / 60°C). That second reaction is your insurance policy - it means you don't have to race to get the dough shaped and into the oven before all the lift is gone.
Baking soda is the other route, but it's trickier. Soda needs an acidic ingredient to activate - yogurt, buttermilk, vinegar, or lemon juice. Use too much soda without enough acid and you'll get a metallic, almost soapy taste that no amount of mozzarella can hide. It can also mess with browning, creating uneven or premature darkening on the crust. If you go this route, a good starting ratio is about 1/4 teaspoon of baking soda per 1/2 cup of acidic liquid.
One important note: before you start mixing, make sure your leavener is still active. Baking powder and baking soda both lose potency over time, and an expired leavener is the number one reason yeast-free dough comes out flat and dense. Quick test: drop a teaspoon of baking powder into hot water (or baking soda into vinegar). If it bubbles vigorously, you're good. If it just sits there, toss it.
For simplicity and consistency, baking powder is the move for most people.
The Yogurt Shortcut: 2-Ingredient Dough
If you want the absolute fastest path to a yeast-free pizza, there's a wildly popular method that uses just two ingredients: self-rising flour and plain Greek yogurt, mixed in roughly equal parts by weight.
It sounds too simple to work, but the chemistry is actually solid. The lactic acid in the yogurt activates the baking powder that's already in the self-rising flour, giving you a modest rise. More importantly, that acid has a tenderizing effect on the gluten - it produces what bakers call a "short" crumb, meaning a crust that's crisp on the outside but soft and slightly bready inside rather than tough or chewy. The yogurt also adds a subtle tang that mimics the flavor complexity you'd normally only get from a long fermentation.
It's not going to rival a 72-hour cold-fermented dough, but for a Tuesday night pizza with minimal cleanup, it's genuinely impressive. Use about 150g of each for one 10" pizza. Knead it for a minute or two until it comes together, shape it, and bake on a hot stone or steel.
Why All-Purpose Flour (Not Bread Flour)
If you bake yeasted pizza regularly, your instinct is probably to reach for bread flour or even 00 flour. Resist that here.
Bread flour has a higher protein content (12–14%), which builds a strong, elastic gluten network - exactly what you want when yeast is producing gas over hours and you need that structure to hold it. But without a long fermentation to relax that gluten, high-protein dough just ends up tough and "snappy." It'll fight you when you try to stretch it and spring back like a rubber band.
All-purpose flour (10–12% protein) gives you a more tender, biscuit-like crumb that's easier to roll out and more pleasant to eat. Think of it this way: you're making a different kind of crust, not an inferior version of a yeasted one. (For a full breakdown of protein percentages, the W-index, and which brands to buy, see my flour guide.)
If you do want to use bread flour for a chewier result, you can make it work - just increase the hydration by a few percentage points and add a bit more olive oil (bump it to 7–8%) to keep things tender. The fat helps "shorten" the gluten strands so they don't turn the crust into a rubber band.
Self-rising flour is also worth knowing about. It's just all-purpose flour with baking powder and salt already mixed in - so if that's what you have on hand, you can skip adding those separately. Just account for the leavening and salt that's already in there so you don't double up.
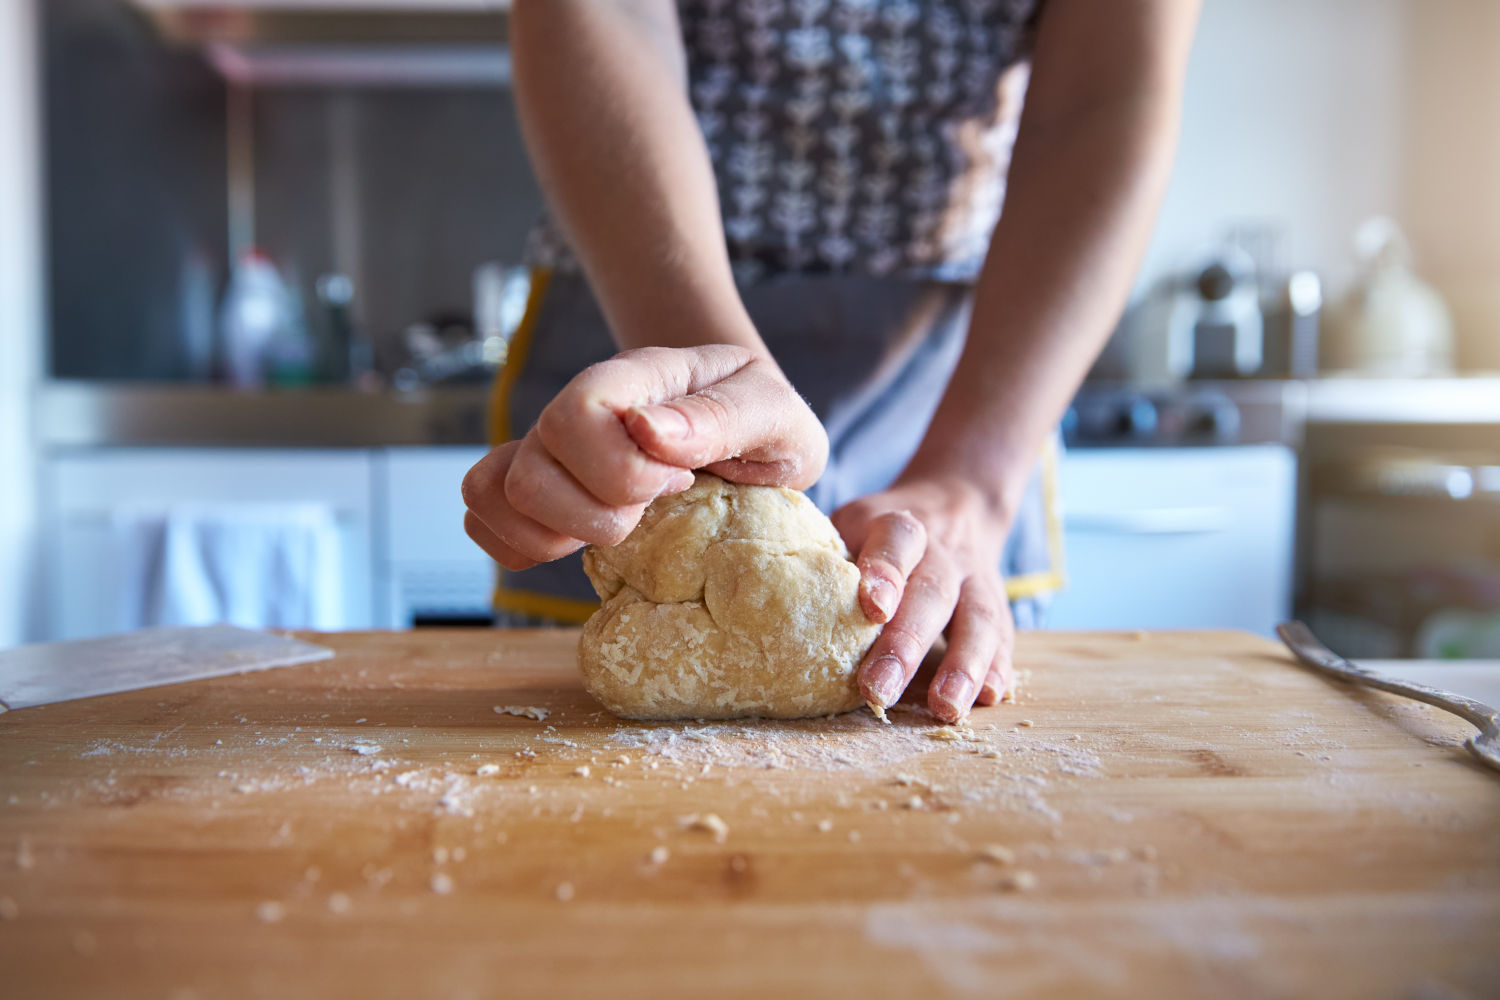
Don't Over-Knead (But Try an Autolyse)
This is probably the biggest technique difference from yeasted dough. When you're working with baking powder, your leavening power is finite. Every minute you spend kneading is pushing out some of the gas that's already been produced. You don't get it back.
Aim for 3–5 minutes of kneading - just enough to bring the dough together into a smooth, cohesive ball. It doesn't need to pass the windowpane test. It doesn't need to be silky. It just needs to be uniform and workable.
The autolyse trick: If you want better extensibility without extra kneading, try mixing just the flour and water first and letting them sit for 15 minutes before adding the baking powder, salt, and oil. This rest allows the flour to fully hydrate on its own, which means you need less mechanical work to get the dough smooth. It's especially helpful if you're using a higher-protein flour that would otherwise be resistant to rolling. You're not adding time to the active work - you're just front-loading a short rest that does the work for you.
After kneading, let the dough rest for another 5–10 minutes under a damp towel. This isn't a "rise" - it's just giving the gluten a chance to relax so the dough is easier to stretch or roll without fighting you. If the dough snaps back stubbornly when you try to shape it, give it another 10–15 minutes of rest. That snap-back is the gluten telling you it needs more time to loosen up.
Styles That Actually Work Best Without Yeast
Here's where the reframe happens: yeast-free dough isn't a compromise for every pizza style. For some styles, it's actually the right approach.
Tavern-style (Midwest bar pizza): That ultra-thin, cracker-crisp crust cut into squares? It doesn't need or want a big, airy rise. A quick chemical leaven gives you exactly the right amount of structure without any puffiness. Using beer in the dough is a common trick in tavern recipes - the carbonation creates tiny, crisp bubbles across the surface that are tough to replicate with water alone.
St. Louis style: Similar to tavern-style but taken even further - a very low hydration (35–50%) with a higher oil ratio (up to 10%) creates a distinctly brittle, cracker-like texture. Yeast-free methods are practically the default here.
Cracker crust: Roll it thin, dock it with a fork, bake it hard. Yeast-free dough is made for this.
Flatbread-style: If you're topping with olive oil, fresh herbs, and simple ingredients, a quick flatbread base is fast, easy, and delicious.
Chicago deep dish: This one might surprise you. Deep dish relies on a high fat content (15–20% oil or butter) to create a "short," almost crumbly crust. That heavy, buttery character means chemical leaveners can step in for yeast without drastically changing the eating experience. It won't be identical, but it's closer than you'd expect.
Roman-style pizza al taglio: The rectangular, crispy-bottomed slices you'd grab from a bakery counter. A well-hydrated quick dough pressed into an oiled sheet pan gets surprisingly close.
The styles where you'll feel the difference most are ones that depend on a big, blistered, airy rim - Neapolitan, for example. That open crumb structure really does need biological fermentation and time. But for everything else on this list, yeast-free is a legitimate choice, not a fallback.
The Pale Crust Fix
The most common complaint about quick-rise pizza is that it comes out looking pale and floury - like it didn't quite finish cooking even though it did. This happens because long fermentation breaks starches down into simple sugars, and those sugars are what drive browning (the Maillard reaction). No fermentation means fewer sugars means less color.
Here's how to fix it:
Add a little sugar to the dough. The 1.5% in the recipe above is there specifically for this. It's not enough to make the crust taste sweet - it's just enough to give the oven something to brown. If you want to go a step further, diastatic malt powder (available at most baking supply stores or online) is even more effective - it contains enzymes that actively break down starches into sugars during baking, mimicking what fermentation does naturally.
The pretzel trick. This one's a game-changer. Mix about 1/2 teaspoon of baking soda into 2 tablespoons of warm water and brush it onto the exposed rim (the cornicione) right before the pizza goes in the oven. The alkaline surface accelerates the Maillard reaction dramatically - the same chemistry that gives pretzels their deep mahogany color. You'll get golden-brown edges in minutes instead of that anemic, floury look.
Brush the edges with olive oil or milk. This is the simplest fix and one a lot of people skip. A light coat of olive oil or a milk wash on the rim helps conduct heat to the surface more effectively, preventing that dry, white appearance that screams "quick dough." It also adds a subtle sheen that makes the finished pizza look more professional.
Use a pizza stone or steel, and crank the heat. This matters for any pizza, but it's especially critical here. Preheat your stone or steel for at least 45 minutes at the highest temperature your oven allows - 500°F minimum, 550°F if your oven goes there. If you have a broiler, flip it on for the last 2–3 minutes of the bake. The intense bottom heat from the stone crisps the base before the toppings overcook, and the overhead broiler handles the top.
Bake Times and Temperatures
Since we're not depending on a slow rise, timing is pretty straightforward:
- Oven temperature: 500–550°F (260–290°C), preheated for at least 45 minutes with your stone or steel inside
- Bake time: 7–10 minutes for a thin crust, 10–14 for a thicker one
- Visual cue: The cheese should be bubbling with a few brown spots, and the rim should be golden (especially if you used the pretzel trick)
If you're using a sheet pan instead of a stone, you'll need a couple extra minutes - and consider oiling the pan generously for a fried-bottom effect that adds its own kind of crunch.
The Beer Hack
Swapping water for beer is one of the best upgrades you can make to a yeast-free dough. It does three things at once: the carbonation adds extra lift (a bonus leavening agent, essentially), malt sugars improve browning so you're less dependent on added sugar, and it brings a subtle flavor complexity that plain water can't match.
The type of beer matters, but the rules are less rigid than you might think:
Light lagers and pilsners are the safest, most versatile choice - high carbonation, neutral flavor, crisp results. This is the go-to for most pizza styles.
IPAs and hoppy ales actually work well if you're pairing with bold toppings. The citrus and floral notes from the hops can complement spicy sausage, jalapeños, or other aggressive flavors. They won't work as well with a delicate margherita.
Stouts and porters bring roasted, malty depth and produce a noticeably darker crust. These pair best with heavy, savory toppings - think mushrooms, caramelized onions, or smoked meats. The carbonation is lower, so you'll get less lift, but for a thin, crispy style that's not a problem.
For your first attempt, stick with a lager or pilsner. Once you've got the basics down, experimenting with different styles is half the fun.
Make It Ahead: Freezing Yeast-Free Dough
One of the best moves with yeast-free dough is to make a double or triple batch and freeze the extras. You lose very little quality, and you end up with a "pizza kit" that goes from freezer to oven in about 20 minutes.
The key difference from freezing yeasted dough: freeze yeast-free dough as soon as possible after kneading. Because the chemical reaction between baking powder and water is time-sensitive, the longer the dough sits at room temperature, the more leavening power it spends before it ever reaches the oven.
Two approaches work well:
Freeze raw dough balls right after kneading. Wrap them tightly in plastic wrap, then into a freezer bag with the air squeezed out. When you're ready to use one, thaw it in the fridge for a few hours or on the counter for about an hour, then shape and bake as usual. Check out my full guide on how to freeze pizza dough for the details.
Par-bake the crust for 5–7 minutes (until it's set but not browned), cool it completely, then freeze it flat. This is the fastest path from freezer to table - just add toppings to the frozen crust and bake until everything's hot and bubbly. It also eliminates the thawing step entirely.
Either way, frozen dough keeps well for 2–3 months. And if you need a refresher on the thaw, my guide on how to thaw frozen pizza dough walks through the best methods. For general shelf-life info, I've also covered how long pizza dough lasts in the fridge and whether pizza dough can go bad so nothing goes to waste.
A Note on Sourdough (and Sourdough Discard)
You might be thinking: "What about sourdough? That doesn't use commercial yeast."
You're right - sourdough relies on wild yeast and bacteria captured in a starter culture, not packaged yeast from the store. And sourdough pizza is fantastic. But it's a completely different process. You need an active starter (which takes at least a week to build from scratch), and the dough still needs hours of fermentation time. It solves the "no yeast packet" problem but not the "no time" problem.
That said, if you already maintain a sourdough starter, there's a great hybrid approach: sourdough discard + baking powder. Instead of using plain water in the recipe above, substitute some or all of it with your discard. You get the tangy, complex flavor from the lactic acid in the discard, plus the reliable quick rise from the baking powder. It's the best of both worlds - fermentation flavor without fermentation time. If you do have the time and want to use your starter as a proper leavening agent, I walk through the full levain process in my prefermented pizza dough guide. And if you'd rather stick with commercial yeast, my guide to the best yeast for pizza covers types, brands, and how much to use.
Be Honest: Yeasted Dough Is Still Better
I'm not going to pretend otherwise. If you have the time, the ingredients, and an active packet of yeast, a properly fermented pizza dough will outperform any chemical leaven - and it's not particularly close.
Here's what you're giving up with a yeast-free crust:
Flavor complexity. During fermentation, yeast produces organic acids, esters, and alcohols that create the subtle, nutty, slightly tangy character of a well-made crust. A 24-hour cold ferment develops flavors that baking powder simply can't replicate. A 48- or 72-hour ferment takes it even further. Chemical leaveners produce carbon dioxide and that's about it - the flavor is clean but one-dimensional.
Oven spring. When a yeasted dough ball hits a ripping-hot stone, three things happen at once: the trapped CO2 bubbles expand rapidly from the heat, moisture in the dough flashes to steam, and the yeast fires off a final burst of gas before the rising temperature kills the cells. Hours of fermentation have built up large, well-distributed gas cells and a strong, elastic gluten network that can stretch to contain all that expansion - which is what creates the big, airy bubbles in a Neapolitan rim and the light, open crumb that makes a great crust feel almost weightless. Baking powder gives you a modest, uniform rise - adequate, but never dramatic.
Chew and structure. The long development of a gluten network during fermentation gives yeasted dough a texture that chemically leavened crusts can't match. There's a reason the best thin-crust New York slices have that characteristic fold-and-not-crack flexibility - the gluten has been built up over hours and has the strength to support it. Quick doughs tend to land somewhere between "biscuit" and "cracker," which is fine for certain styles but limiting for others.
None of this means yeast-free dough isn't worth making. It absolutely is - especially for the styles we covered above. But if tonight's yeast-free pizza gets you hooked on the process, the natural next step is to try a proper fermented dough when you have a free afternoon. My complete guide to making homemade pizza walks through everything from a simple same-day dough to advanced techniques like cold fermentation and preferments.
Build Your Recipe in PizzaLogic
Whether you're making a quick yeast-free crust for tonight or ready to graduate to a weekend project with a 72-hour cold ferment, the PizzaLogic dough calculator takes the guesswork out of the math.
Plug in your target ball weight, number of pizzas, and preferred hydration, and it gives you exact gram measurements for every ingredient. No more eyeballing. No more "was it one teaspoon or two?" Just consistent, repeatable dough every time you make it - from a quick tavern-style pie to a three-day Neapolitan to a Detroit-style pan pizza and everything in between. You can also grab the PizzaLogic app on your phone so it's right there in the kitchen when you need it.
FAQ
Does pizza dough without yeast taste different? Yes, but not in a bad way. You won't get the slightly tangy, complex flavor that comes from fermentation. Instead, the crust tastes cleaner and more neutral - closer to a biscuit or flatbread. The toppings become the star, which isn't necessarily a downside. If you want more flavor depth, the yogurt method or the sourdough discard hack both add complexity without adding time.
Can you make Neapolitan pizza without yeast? Not really - at least not authentically. Neapolitan pizza depends on a high-hydration dough with a long fermentation to create that signature puffy, charred, leopard-spotted rim. A chemical leaven can't replicate that texture or the oven spring you get when live yeast hits a 900°F deck. But you can make a great thin-crust pizza without yeast. It's just a different style.
How long does no-yeast pizza dough last? In the fridge, use it within 24 hours - the baking powder loses potency over time, so the longer it sits, the flatter your crust will be. In the freezer, it holds for 2–3 months without much quality loss. If you're going to store it, freeze it right after kneading to preserve as much leavening power as possible. For more detail, check out my guides on how long pizza dough lasts in the fridge and whether pizza dough can go bad.
Can I use baking soda instead of baking powder? You can, but you'll need an acidic liquid (yogurt, buttermilk, or a splash of vinegar) to activate it. Baking powder is easier because it's self-contained - no acid pairing required. If you use soda without enough acid, you'll get a metallic aftertaste and potentially uneven browning.
Why is my yeast-free dough tough or rubbery? Two likely culprits: too much kneading (which deflates the chemical leavening and overworks the gluten) or too much protein in the flour (bread flour instead of all-purpose). Keep the kneading short - 3 to 5 minutes max - and stick with AP flour. If you're set on bread flour, increase the oil to 7–8% and try the autolyse method to improve extensibility without extra kneading.
My dough keeps snapping back when I try to stretch it. What's wrong? The gluten hasn't had enough time to relax. Cover the dough with a damp towel and let it rest for another 10–15 minutes, then try again. An autolyse (resting just the flour and water for 15 minutes before adding other ingredients) can also prevent this by letting the gluten hydrate more evenly upfront.
My pizza came out completely flat. What happened? Most likely your baking powder or baking soda was expired. These leaveners lose potency over time, especially in humid environments. Test before you bake: drop a teaspoon of baking powder into hot water, or baking soda into vinegar. If you see vigorous fizzing, it's still good. If it barely reacts, replace it.