If you've been making pizza with same-day dough, you're leaving a lot of flavor on the table. Cold fermenting pizza dough is one of those techniques that sounds fancier than it is - you're literally just putting dough in the fridge and waiting - but the difference it makes is hard to overstate. We're talking deeper flavor, better texture, and the kind of browning that makes people ask what bakery your crust came from.
I've been cold fermenting my dough for years now, and it's become non-negotiable. Here's everything I've learned about how to do it right.
Why Cold Ferment Pizza Dough?
At room temperature, yeast is in a hurry. It chews through sugars and pumps out CO₂ fast - sometimes faster than the flour's enzymes can do their job breaking starches down into the complex sugars and organic acids that actually give crust its flavor.
Drop the temperature to fridge range (34–38°F / 1–3°C), and everything slows down. Dough at typical fridge temperature ferments roughly six times slower than dough at room temperature. The yeast is still working, just much more gradually, which gives the enzymes time to catch up. That slow work produces three things you can't fake with a quick rise:
Flavor that's actually complex. All fermentation produces acids, but temperature determines which acids dominate. Warmer ferments favor lactic acid - the mild, creamy tang you'd recognize from yogurt. Cold ferments shift production toward acetic acid, which is sharper and more vinegary, closer to what you taste in a good sourdough. A 48-hour cold fermented pizza dough has a depth that same-day dough just can't touch - a layered complexity that comes from that balance of acids plus the wheaty sweetness of the flour itself.
A dough that actually cooperates. Enzymes called proteases gradually relax the gluten network during the long rest, breaking gluten proteins (gliadin and glutenin) into smaller peptides. The practical result? Dough that's more extensible and less elastic - it stretches easily without snapping back at you. If you've ever fought with a tight dough ball that keeps shrinking, cold fermentation is the fix.
Better browning, almost automatically. While the proteases work on the gluten, another group of enzymes - amylases - are busy breaking down complex starches into simple sugars like glucose and maltose. Those sugars fuel the Maillard reaction in your oven, which is the chemical reaction between reducing sugars and amino acids that gives you the golden, blistered, leopard-spotted crust you see on great Neapolitan pies. A cold-fermented dough simply has more of these precursors available when it hits the heat.
How Long to Cold Ferment Pizza Dough?
This is the question everyone asks, and the honest answer is: it depends on your flour, your yeast amount, and your fridge temperature. But here are general guidelines that hold true for most home setups:
24 hours - A noticeable improvement over same-day dough. The flavor starts developing and the texture gets easier to work with. If you're just getting started with cold fermentation, this is a great first step.
48 hours - This is the sweet spot for most people. You get a real depth of flavor, the dough handles beautifully, and the browning is excellent. If I'm making pizza for company, 48 hours is my default.
72 hours - Maximum flavor complexity and an incredibly light, airy structure. A 72-hour cold ferment pizza dough is what you'll find at many serious pizzerias. The crust gets that slightly tangy, almost sourdough-adjacent quality without actually using a starter.
96+ hours - You can push it here, and some people do. But you're walking a tightrope. The gluten starts to degrade, and the yeast can run out of food, leaving you with a dough that's slack, hard to handle, and prone to collapsing. Most high-protein bread flours will hold up to about 5 days in the fridge, but honestly, the returns diminish past 72 hours for most home bakers.
A note on fridge temperature: This matters more than people realize. If your fridge runs warm (40°F+), fermentation moves faster and your dough may peak earlier. If it runs cold (34°F), you've got more runway. It's worth checking yours with a cheap thermometer - I was surprised to find mine varied by almost 4 degrees depending on shelf position. For a day-by-day breakdown of what to expect, see my guide to how long pizza dough lasts in the fridge.
Your Flour Matters More Than You Think
Not all flour can handle a multi-day cold ferment, and this is where a lot of home bakers run into problems. The longer the ferment, the stronger the flour needs to be - "stronger" meaning higher protein content and better gluten quality.
Here's a practical breakdown:
All-purpose flour (9–11% protein) - Fine for same-day dough, but it doesn't have the gluten strength to survive a real cold ferment. Past about 12 hours, you're risking a dough that collapses or turns into a sticky mess. If AP flour is all you have, keep it to an overnight rest at most.
Bread flour (12–13% protein) - The workhorse for home cold ferments. It handles 24–48 hours comfortably, gives you great chew, and is widely available. This is what I'd recommend for most people starting out.
"00" flour like Caputo Blue (12.5% protein) - The professional standard for Neapolitan pizza. Don't let the seemingly similar protein number fool you - the quality of the gluten in Italian "00" flour is different, designed specifically for high-heat ovens and longer ferments. Handles 48–72 hours beautifully.
High-gluten flour (14%+ protein) - For the truly committed. This is what NY-style shops use for ultra-long ferments of 72 hours or more. The extra protein means the gluten network stays intact even as proteases do their work over several days. If you want to push past 72 hours, this is your flour.
The bottom line: if your dough keeps collapsing or going flat during a long ferment, the flour is probably the problem before anything else. For more on choosing the right flour, see my complete flour guide.
Cold Ferment Pizza Dough Recipe: 72-Hour Artisan Method
This recipe uses the Lehmann method - a well-tested approach developed by Tom Lehmann at the American Institute of Baking, where you divide and ball the dough immediately after mixing rather than doing a bulk rise first. It's efficient, it reduces variability, and it works exceptionally well for long cold ferments because smaller individual balls cool down in the fridge much faster than a big bulk mass.
Some bakers prefer a hybrid approach - letting the dough bulk rise at room temperature for 1–2 hours before dividing and refrigerating. This can jumpstart acid production and give you more intense flavor after just 24 hours. But it also introduces more variability, since a larger mass takes longer to cool and can over-proof in the center. For consistency, especially on longer ferments, I stick with Lehmann.
For flour, reach for a high-protein bread flour (12.5%+ protein) or a professional "00" flour like Caputo Pizzeria (Blue). See the flour section above for why this matters.
Ingredients (Baker's Percentages)
- Flour: 100% - high-protein bread flour or "00"
- Water: 65–70% - use cold water to keep the final dough temperature in check (if you're new to high-hydration dough, start at 62–63% for something firmer and easier to handle, then work your way up)
- Salt: 2.5% - fine sea salt dissolves more evenly
- Instant dry yeast: 0.1–0.2% - you need very little for a long ferment; too much is the #1 mistake
- Sugar or diastatic malt: 1% - insurance against a pale crust (the yeast will consume some sugars over 3 days)
- Olive oil: 1–2% - optional, gives a slightly more tender crumb
Not sure how to convert percentages to grams? The PizzaLogic Dough Calculator does the math for you - plug in your flour type, number of dough balls, and fermentation time, and it spits out exact measurements. It's especially handy for dialing in yeast amounts on long ferments, where even a gram too much can cause problems.
A note on yeast types: This recipe calls for instant dry yeast (IDY), which is the most common type for home baking. If you're using a different yeast, here are the conversions: to substitute active dry yeast (ADY), multiply the IDY amount by 1.25. To substitute fresh cake yeast, multiply by 3. The differences come down to moisture content and cell concentration - IDY is the most concentrated, fresh yeast the least. My complete yeast guide covers the differences in detail.
Step-by-Step Instructions
1. Mix and knead. Combine your dry ingredients, add the cold water, and mix until you have a shaggy mass. Knead (by hand or stand mixer) until the dough is smooth and passes the windowpane test - you should be able to stretch a small piece thin enough to see light through it without it tearing. Aim for a final dough temperature between 75–80°F (24–27°C). Using cold water helps you hit this target, especially if your kitchen runs warm.
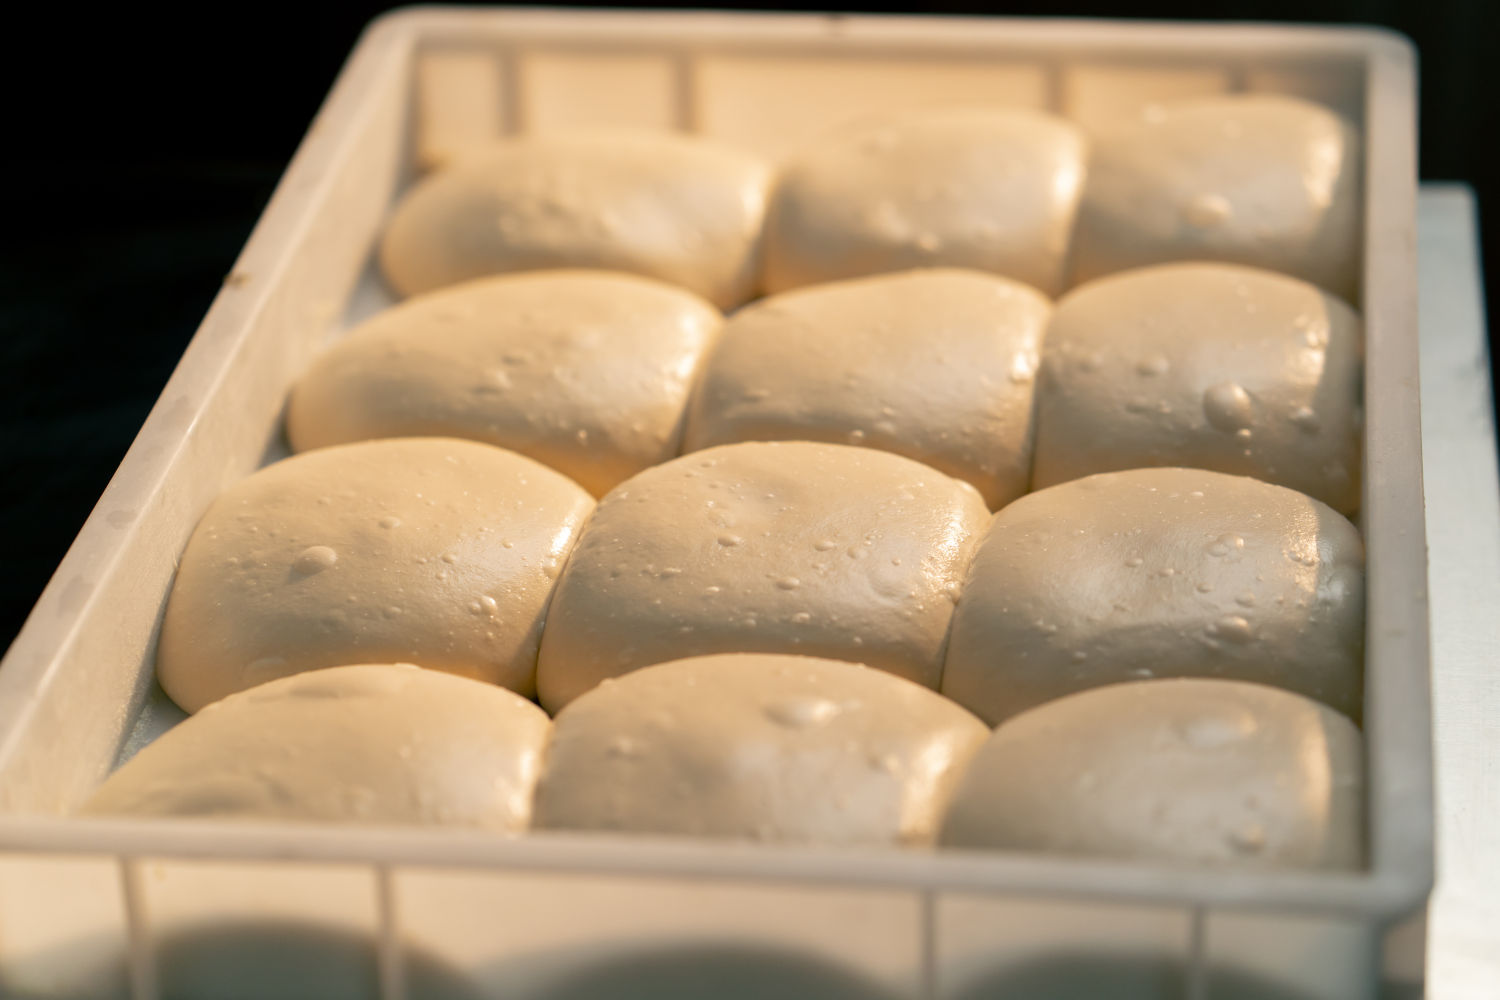
2. Divide and ball immediately. Scale your dough into individual portions (220–280g per ball is typical, depending on your pizza size) and shape them into tight, smooth balls. Tuck the seam underneath.
3. Oil and contain. Place each ball into a lightly oiled container - round deli containers work great, or you can use a sheet pan with a lid if you're making several. A good rule of thumb: the container should be about three times the height of the dough ball, with roughly a finger-width of space around the sides. Too big and the dough spreads flat without support; too small and it presses against the walls and overheats.
4. Cross-stack for the first 2 hours. Put the containers in the fridge with the lids slightly cracked open (or "cross-stacked" if you're using stacking trays). This lets the residual heat escape and prevents condensation from forming on the dough's surface, which causes stickiness later. A light film of olive oil on the exposed dough surface helps prevent it from drying out during this open-lid phase.
5. Seal and wait. After 2 hours, close the lids fully and let the dough do its thing for 48–72 hours.
6. Temper before baking. This step is critical and often overlooked. Pull the dough out of the fridge 2 to 4 hours before you plan to bake. Cold dough is stiff, fights back when you stretch it, and won't brown properly in the oven - in fact, cold dough going straight into high heat often develops what's called the "measles" defect: large, dark blotches scattered across an otherwise pale and under-baked crust. You want the dough relaxed and roughly room temperature (around 75–80°F) before it goes anywhere near your peel. In a warm kitchen, 2 hours may be plenty. In a cooler room, give it closer to 3–4.
7. Shape and launch. When the dough is tempered and ready, use your fingertips to press from the center outward, pushing air toward the rim to preserve the cornicione. Pick it up and gently rotate it like a steering wheel, letting gravity stretch it into a thin, even disk. For the peel, dust with a 50/50 mix of "00" flour and semolina - it slides better than flour alone and gives the bottom a nice crunch.
Troubleshooting Your Cold Ferment
The dough is sticky and wet on the surface. This is almost always a condensation issue. Make sure you're doing the 2-hour open-lid cooling phase before sealing. Also check that your containers are oiled - a light coat of olive oil on the ball and the container walls makes a big difference. If it's already sticky, dust the ball generously in a bowl of flour before stretching. For more fixes, see my guide on why pizza dough gets sticky.
The dough keeps snapping back when I stretch it. It's either too cold (give it more tempering time at room temperature) or it's underfermented. A well-fermented dough ball should feel soft, pillowy, and should stretch without much resistance. If it's fighting you, wait another 30–60 minutes. For future batches, you can also try bumping hydration up by 2–3% - more water relaxes gluten bonds and makes the dough more extensible. Alternatively, switching from a high-gluten flour to a slightly lower-protein "00" naturally reduces elasticity.
The crust came out pale and didn't brown. Over a long ferment, the yeast consumes available sugars. If there's nothing left for the Maillard reaction, you get a pale, sad crust. Two fixes: add a small amount of sugar or diastatic malt powder to your recipe, or make sure you're using enough heat. A pizza steel or stone preheated for a full hour at your oven's max temperature makes a huge difference. Also worth noting - very high acidity (common in ultra-long ferments) can itself inhibit browning, even when sugars are present. If you're regularly pushing past 72 hours and getting pale crusts, it may be the acid, not just the sugar.
There's a raw, doughy layer under the sauce (the "gum line"). This is one of the most frustrating defects. That pasty, underbaked strip right beneath the toppings usually has one of three causes: too much sauce or wet toppings trapping moisture, dough that was still cold in the center when it went into the oven, or an over-fermented dough that's lost its ability to bake through properly. The fix is usually some combination of less sauce, longer tempering, and making sure your oven (and stone/steel) is fully preheated. If it keeps happening, par-baking your crust before adding toppings is a reliable fix.
The dough seems to have collapsed or gone flat. You've likely over-fermented. The yeast ran out of food and the gluten structure gave out. This usually happens past the 96-hour mark, or sooner if you used too much yeast or your flour wasn't strong enough for the ferment length. Next time, reduce your yeast percentage - for a 72-hour cold ferment, 0.1–0.15% IDY is plenty. And double-check that your flour has enough protein for the duration you're attempting (see the flour section above). The PizzaLogic calculator can help you nail the right yeast amount for your target fermentation time.
Quick Reference: Cold Fermentation at a Glance
| Factor | Recommendation |
|---|---|
| Fridge temp | 34–38°F (1–3°C) |
| Yeast (IDY) for 48 hrs | 0.15–0.2% |
| Yeast (IDY) for 72 hrs | 0.1–0.15% |
| Hydration | 62–70% (lower = easier to handle) |
| Flour protein | 12.5%+ recommended |
| Tempering time | 2–4 hours before baking |
| Container height | ~3× the dough ball height |
| Max practical duration | ~5 days (quality peaks at 48–72 hrs) |
Yeast conversions: IDY → Active Dry Yeast: multiply by 1.25. IDY → Fresh Yeast: multiply by 3.
Final Thoughts
Cold fermenting pizza dough is one of those rare techniques where more patience directly equals better results, no extra skill required. If you've never tried a long ferment pizza dough before, start with 48 hours and see the difference for yourself. Once you taste a properly fermented crust - with that complex, slightly tangy flavor and effortless stretch - room-temperature dough starts feeling like a compromise.
New to making dough? Start with the complete beginner's guide to homemade pizza to nail the basics first. Ready to plan your next cold ferment? The PizzaLogic Dough Calculator makes it easy to get your hydration, yeast, and salt dialed in for any fermentation length. Punch in your details and take the guesswork out of it.
Happy baking. 🍕