If you have been making pizza at home for a while, you have probably hit a wall. Your dough at 60% or 65% hydration makes a perfectly decent pie, but it is missing something. The crust comes out a little dense, a little bready, a little... fine. Meanwhile, the pizzas you see coming out of serious pizzerias have this impossibly light crumb full of wild, irregular holes and an exterior that shatters when you bite through it.
The difference, more often than not, is water.
Pushing your hydration above 70% fundamentally changes how your dough behaves in the oven. It also fundamentally changes how it behaves on your countertop - and that second part is where most people bail. High hydration pizza dough is stickier, sloppier, and far less forgiving than what you are used to. But the results, once you get the handling down, are not even in the same category.
I built the PizzaLogic dough calculator to make it easy to calculate baker's math and play with hydration and other variables with ease. This guide covers everything that actually matters when working with dough at 70% hydration and above - the science, the technique, the failure modes, and the fixes.
What High-Hydration Pizza Dough Actually Means
If baker's percentages are new to you, the concept is simple: every ingredient is expressed as a percentage of the flour weight. Flour is always 100%. So if you have 500 grams of flour and 350 grams of water, that is 70% hydration.
Most beginner-friendly pizza dough recipes land between 58% and 65%. That range is comfortable to work with. The dough forms a smooth ball, it does not cling to your hands, and it is pretty hard to screw up. Once you start climbing past 65%, the texture shifts. At 70%, the dough is noticeably slacker and stickier. At 75%, it barely holds its shape. At 80% and above, you are essentially working with a batter that somehow needs to become pizza.
For a deeper breakdown of how water percentages affect your dough at every level, my Ultimate Guide to Pizza Dough Hydration covers the full spectrum from 55% to 80%+.
The term "high hydration" does not have an official cutoff, but in the pizza world, most people use it to mean anything 68% to 70% and above. For this guide, I am focusing primarily on the 70% to 75% range since that is the sweet spot where you get dramatically better results without needing professional equipment or years of experience. If you are brand new to making pizza dough, start with my beginner's guide first.
Why More Water Makes Better Pizza
This is not just a texture preference. There is real science behind why wetter dough produces a better crust.
Steam and oven spring. Water turns to steam at 212F. In a 500F+ oven, that conversion happens fast and violently. The steam trapped inside the gluten network forces the dough to expand rapidly during the first few minutes of baking. This is oven spring, and more water means more steam, which means more expansion. The result is larger, more irregular air pockets inside the crust and a lighter overall structure.
Starch gelatinization. When starch granules in flour are surrounded by sufficient water and exposed to heat (around 150F to 180F), they absorb that water, swell, and gel. This process is what gives the interior of your crust its soft, custardy texture rather than a dry, crumbly one. Higher hydration means more complete gelatinization, which means a more tender crumb.
Maillard reaction and crust color. A wetter dough surface produces better browning. The moisture on the exterior of the dough evaporates quickly in a hot oven, and that transition from wet to dry surface is what allows Maillard browning and some caramelization to happen rapidly. You get deeper color and more complex flavor in the crust.
Longer bake tolerance. In a standard home oven at 500F to 550F, your pizza is in there for 7 to 12 minutes - much longer than the 60 to 90 seconds of a true Neapolitan oven. A lower hydration dough can dry out and turn cardboard-like during that extended bake. Higher hydration gives you a buffer. The extra water keeps the interior moist even as the exterior crisps up.
Flavor development. More water means more enzymatic activity during fermentation. The enzymes in flour (amylase, protease) need water to function, and they break down starches into sugars and proteins into amino acids - both of which contribute to flavor. A 70% hydration dough that cold ferments for 48 hours will taste noticeably more complex than a 60% dough with the same fermentation time.
The Real Challenges (and Why People Give Up)
Let's be honest about what you are getting into. High hydration dough is harder to work with, and the learning curve is steeper than most blog posts will admit.
The initial mix looks terrible. When you first combine flour and water at 70%+, you will get a shaggy, lumpy, sticky mess that looks nothing like dough. This is normal. Your hands will be coated. Your counter will be coated. Your instinct will scream at you to dump in more flour. Do not do it. Adding raw flour at this stage throws off your hydration ratio, creates pockets of underdeveloped gluten, and makes the final product worse, not better.
Gluten development takes longer. At lower hydrations, a few minutes of kneading produces a smooth, window-pane-ready dough. With high hydration, gluten development requires more patience. The excess water dilutes the protein concentration, so the gluten strands take longer to align, link up, and form a strong network. This is why techniques like autolyse and stretch-and-folds are not optional at high hydration - they are essential.
Shaping is a different skill. You cannot just ball up a 70% hydration dough the same way you would a 60% dough. It is too slack. It will spread out on your counter, stick to your bench scraper, and generally refuse to cooperate if you use standard tight-balling techniques. Shaping high hydration dough requires wetter hands, faster movements, and a gentler touch.
Sticking is constant. Wet dough sticks to everything. Your peel, your counter, your hands, the inside of your proofing container. Managing this without adding flour (which defeats the purpose) is an ongoing challenge. If you are fighting sticky dough right now, I go deep on the causes and solutions in Why Is My Pizza Dough So Sticky?.
Launching can go wrong. Getting a stretched-out, high hydration dough off a peel and into the oven without it folding over or sticking is probably the single most nerve-wracking moment in the entire process. This is where good technique and the right dusting flour make or break the pizza.
None of this is meant to scare you off. It is meant to set realistic expectations so you do not get frustrated and assume you are doing something wrong when your first attempt is messy. Messy is the process. The dough gets better with time - both the literal resting time in the fridge and your experience handling it.
Choosing the Right Flour for High Hydration
Flour selection matters more at high hydration than at any other hydration level. The wrong flour will fail you completely.
Why protein content is critical. Gluten is formed when two proteins in flour - glutenin and gliadin - hydrate and link together. A flour with 10% protein (typical all-purpose) simply does not have enough of these proteins to absorb 70% water and still form a strong, extensible gluten network. The dough will be soupy and impossible to shape. You need flour in the 12.5% to 14.5% protein range to handle high hydration reliably.
Bread flour is the most accessible option for most home bakers. King Arthur Bread Flour (12.7% protein) is a solid baseline for 70% hydration. For pushing higher, something like a high-gluten bread flour in the 13% to 14% range gives you more headroom.
Italian 00 flour is not all created equal, and this confuses a lot of people. The "00" refers to how finely the flour is milled, not the protein content. A typical Neapolitan 00 (like Caputo Pizzeria) runs around 12.5% to 13% protein, which works fine at 70%. But some 00 flours are much lower protein and are meant for cakes or pasta - those will fall apart at high hydration.
If you want to use an Italian 00, look at the W-value (a measure of flour strength) rather than just protein percentage. A W-value of 260 to 320 is a good range for high hydration pizza. I go into much more detail on specific flours and how to match them to your style in The Best Flour for Pizza Dough.
Blending flours is worth experimenting with once you are comfortable. A blend of 80% strong bread flour and 20% 00 flour can give you the strength to handle high hydration with the finer crumb texture of 00. Some bakers also add a small percentage (5% to 10%) of whole wheat or semolina for flavor complexity and a slightly different texture. My post on Semolina and Pizza covers how semolina behaves in dough versus as a dusting agent.
A note on freshness. Old flour absorbs water differently than fresh flour. If your bag has been sitting open in the pantry for months, the protein may have degraded and the flour may have absorbed ambient moisture. For high hydration work, use fresh flour and store it sealed.
Water Temperature and Quality
This is something most high-hydration guides skip, and it actually matters.
Water temperature controls fermentation speed. Warmer water accelerates yeast activity. For a dough you plan to cold ferment, starting with cool water (around 60F to 65F) helps keep the dough temperature in check and prevents the yeast from overproducing gas before it hits the fridge. If you are doing a same-day room temperature ferment, slightly warmer water (around 70F to 75F) is fine.
The general rule of thumb: your target dough temperature after mixing should be around 73F to 76F for cold fermentation schedules. You can work backward from there based on your room temperature and flour temperature to figure out what water temperature to use. The PizzaLogic calculator accounts for this.
Water quality matters less than people think, but it is not irrelevant. Heavily chlorinated tap water can slightly inhibit yeast activity. If your tap water has a strong chemical smell, using filtered water is a reasonable precaution. But do not buy special "pizza water" or stress about mineral content - that level of optimization is vanishingly small compared to technique and fermentation management.
The Key Techniques for High Hydration Dough
Standard kneading does not cut it when your dough is this wet. You need a different toolkit.
Autolyse
This is the single most impactful technique for high hydration dough, and it is also the easiest. Mix just your flour and most of your water (hold back a small amount for dissolving yeast later). Stir until there are no dry patches - it will look rough and shaggy, and that is fine. Cover it and walk away for 30 to 60 minutes.
During this rest, two things happen. First, the flour fully hydrates. Every starch granule and protein strand absorbs water, which takes time - especially with high-protein flour. Second, gluten begins to form passively through enzymatic activity, without any mechanical work. By the time you come back and add your yeast and salt, the dough will already be noticeably smoother and more cohesive. You have a head start on gluten development before you even touch it.
For high hydration dough specifically, I recommend a full 45 to 60 minute autolyse rather than a quick 20 minute one. The extra time makes a real difference in how manageable the dough is afterward.
Bassinage (Reserved Water Method)
This is the technique that takes high hydration dough from "struggling" to "reliable." Instead of dumping all the water in at once, you build the dough at a lower hydration first and add the remaining water gradually.
Here is how it works in practice. Start by mixing your flour with only about 90% to 92% of the total water (so if your final target is 70% hydration, mix the dough initially at around 63% to 65%). Let that autolyse, add your yeast and salt, and develop the gluten until you have a smooth, strong dough. Then slowly work in the remaining water, a tablespoon at a time, folding and squeezing it in.
The dough will fall apart temporarily each time you add water. That is expected. Keep folding and it will come back together, each time a little wetter and slacker but still structurally intact. The advantage here is that you build a strong gluten network first, then stretch it - rather than trying to develop gluten from scratch in a pool of excess water.
Bassinage is particularly useful if you are pushing above 72% to 73% hydration or if your flour is on the weaker side.
Stretch and Folds
Forget traditional kneading for high hydration. You will just end up with dough cemented to your counter. Stretch and folds are the go-to method.
Wet your hands thoroughly. Grab one side of the dough, stretch it up as far as it will go without tearing, and fold it over the top to the opposite side. Rotate the bowl 90 degrees and repeat. Four stretches (one from each side) equals one set.
Do three to four sets, spaced 20 to 30 minutes apart during the first couple hours of bulk fermentation. Each set takes about 30 seconds. Between sets, the dough rests and the gluten relaxes, which means each subsequent set is easier and the dough gets progressively smoother, tighter, and more elastic.
By the final set, the dough should feel dramatically different from where it started - holding its shape in the bowl, pulling away from the sides, and showing visible air bubbles beneath the surface.
Slap and Fold (Rubaud Method)
For dough above 75% hydration, stretch and folds in a bowl may not be aggressive enough. The slap and fold - sometimes called the Rubaud method - is more effective for extremely wet dough.
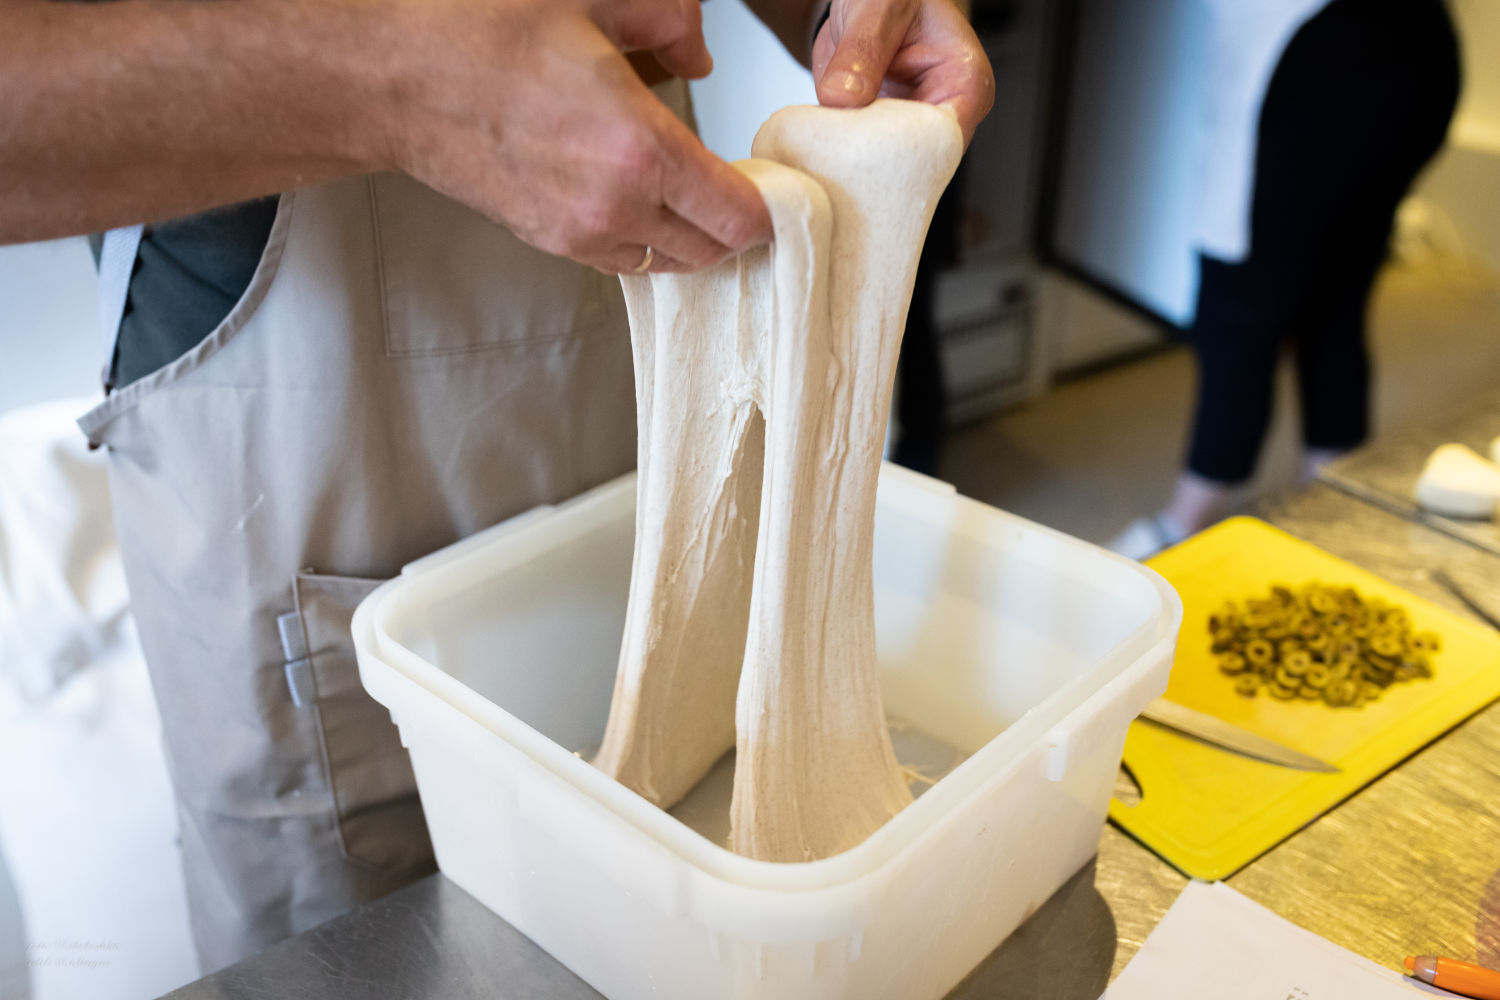
Pick the dough up with both hands, let it drape and stretch under its own weight, then slap the bottom portion onto the counter and fold the top over it. Repeat rapidly. It is messy for the first two or three minutes, with dough flying everywhere. Then suddenly the dough tightens up and starts moving as one cohesive mass. Most doughs take 5 to 8 minutes of slap-and-fold to come together. The transformation feels almost sudden - one moment it is chaos, the next it is smooth.
This technique is harder to describe than to see in action, but the basic rhythm is: scrape off counter, stretch up, slap down, fold over. Fast and confident.
Cold Fermentation: The High Hydration Secret Weapon
Cold fermentation is beneficial for any pizza dough, but for high hydration specifically, it is almost mandatory. Here is why.
It firms up the dough. A wet dough at room temperature is a floppy, hard-to-handle mess. That same dough after 24 hours in the fridge at 38F is noticeably firmer and easier to shape. The cold slows down gluten relaxation and keeps the dough tighter. This alone makes cold fermentation worth it for high hydration.
It develops flavor. The slow, cold environment favors enzymatic breakdown of starches and proteins over fast yeast fermentation. This produces a more complex, slightly tangy flavor with subtle sweetness - the kind of depth you cannot get from a same-day dough. The difference between a 4-hour room temperature ferment and a 48-hour cold ferment is not subtle. It is transformative.
It reduces yeast. Because the cold slows yeast activity so drastically, you use far less yeast in a cold fermented recipe (often 0.1% to 0.5% versus 1% to 2% for a same-day dough). Less yeast means less yeasty flavor and more nuanced wheat and fermentation flavors. I break down the full process and timing in How to Cold Ferment Pizza Dough.
Timing flexibility. A cold fermented dough has a much wider window of usability. A room temperature dough might be perfect at 6 hours and overproofed at 8. A cold fermented dough can be great at 24 hours and still great at 72 hours (depending on yeast amount and dough temperature). That flexibility is huge for home bakers who cannot always time their baking schedule to the hour.
Using a Preferment for Even More Depth
If you want to push flavor even further, consider using a preferment - either a poolish (equal parts flour and water with a tiny amount of yeast, fermented 8 to 16 hours) or a biga (a stiffer preferment with less water). You mix the preferment the night before, let it develop overnight, and then incorporate it into your final dough the next day.
A poolish in particular works beautifully with high hydration dough because the flour in the poolish has already fully hydrated and begun developing gluten and flavor compounds before you even start your final mix. It gives you a head start on both structure and taste. I covered the differences and usage of both in my preferment guide.
A Reliable High Hydration Pizza Dough Recipe (70%)
This recipe is designed for a standard home oven with a pizza steel or stone. It uses the bassinage approach and a 24 to 48 hour cold ferment.
Ingredients (for two roughly 250g dough balls):
- Bread Flour (12.5%+ protein): 290g (100%)
- Water: 203g (70%)
- Fine Sea Salt: 8g (2.8%)
- Instant Yeast: 1g (0.35%)
You can scale this up or down using the PizzaLogic dough calculator, which lets you dial in exact hydration, ball count, and ball weight.
Method:
-
Autolyse. Combine the flour and water in a large bowl. Mix with a fork or your hand until there are no dry spots. It will be rough and shaggy. Cover and let rest for 45 to 60 minutes.
-
Add yeast and salt. Sprinkle the yeast and salt over your autolysed dough. Use the pinch-and-fold method - pinch through the dough with your thumb and fingers, then fold it over itself. Repeat until the yeast and salt are fully incorporated. The dough will feel ragged and broken up at first, then come back together.
-
Stretch and fold - Set 1. Wet your hands. Stretch and fold the dough from all four sides. You will feel it tighten slightly. Cover and rest 20 minutes.
-
Stretch and fold - Set 2. Repeat. The dough should already feel smoother and more elastic. Cover and rest 20 minutes.
-
Stretch and fold - Set 3. Repeat one more time. By now the dough should be holding its shape in the bowl and feel cohesive, though still sticky. Cover the bowl.
-
Bulk ferment. Leave the covered dough at room temperature for about 1.5 to 2 hours after the final fold. You should see some puffiness and maybe a few bubbles on the surface, but the dough should not have doubled. You are looking for about a 30% to 50% increase in volume.
-
Divide and ball. Lightly flour your work surface (a small amount is fine here - you are not mixing it into the dough). Use a bench scraper to divide the dough into two pieces of roughly equal weight. Shape each piece into a ball by tucking the edges underneath. Place each ball into a lightly oiled container with a lid, or onto an oiled tray and cover tightly with plastic wrap.
-
Cold ferment. Place the containers in the fridge for 24 to 48 hours. The sweet spot for this recipe is around 36 to 48 hours, but 24 hours also produces excellent results.
-
Warm up before baking. Remove the dough balls from the fridge 1.5 to 2 hours before you plan to bake. Let them sit at room temperature, still covered, until they are puffy, relaxed, and jiggly to the touch.
Shaping High Hydration Dough Without Destroying It
This is where a lot of home bakers struggle. You spent all this time developing air pockets and gluten structure - now you have to turn a soft, wet dough ball into a flat pizza without deflating it or tearing it.
Do not use a rolling pin. A rolling pin crushes every air bubble you spent hours developing. The whole point of high hydration is those big, irregular pockets in the crust. Flatten them and you are back to a dense, bready pizza.
Generously flour your work surface. I prefer a 50/50 blend of bread flour and semolina for the work surface. The semolina provides coarser texture that prevents sticking better than flour alone, while the bread flour fills the gaps. On the peel, use straight semolina or a semolina-cornmeal blend. Semolina and Pizza covers why semolina outperforms regular flour as a dusting agent.
Press, don't stretch - at first. Place the dough ball on your floured surface. Using your fingertips, gently press from the center outward, leaving about an inch of untouched dough around the perimeter (this becomes your cornicione - the puffy rim). Flip it once and press again. This initial pressing should get the dough to about 70% to 80% of its final size.
Then stretch. Pick the dough up and drape it over the backs of your hands (knuckles, not fingertips - fingertips poke holes). Let gravity do most of the work, rotating the dough as it stretches. Work quickly. High hydration dough is more extensible, which means it stretches more easily but can also tear if you linger in one spot.
Get it on the peel immediately. Once the dough is stretched to size, lay it on your semolina-dusted peel. Give the peel a quick shake to make sure the dough slides freely before you add toppings. If it sticks, lift the edge and throw more semolina underneath. Topping and launching should take no more than 60 to 90 seconds - any longer and the wet dough will start absorbing the semolina and sticking.
Baking: Oven Setup and What to Expect
High hydration dough needs intense heat to get the oven spring that makes it special.
Preheat aggressively. If you are using a pizza steel (which I recommend over a stone for home ovens - see my Pizza Steel Guide for why), preheat your oven to its maximum temperature for a full hour. The steel needs to be fully saturated with heat. A steel that is not hot enough is the most common reason for a pale, undercooked bottom.
Broiler trick. If your oven has a top broiler, switch to broil for the last 2 to 3 minutes of preheating to heat the air at the top of the oven. Then switch back to bake when you launch the pizza. This helps brown the top crust and melt cheese before the bottom overcooks.
What happens in the oven. In the first 2 to 3 minutes, you will see rapid oven spring as the water converts to steam and the dough puffs up. The cornicione will inflate dramatically. After that, the structure sets and browning begins. Total bake time in a home oven at 550F with a steel is usually 6 to 8 minutes. Rotate the pizza 180 degrees halfway through for even color.
Visual cues. The pizza is done when the cornicione is deeply golden to brown with some charred spots (leoparding), the underside is firm and spotted dark brown when you lift it with a peel, and the cheese is fully melted and starting to brown in spots.
Propane and wood-fired ovens change the equation. Everything above assumes a standard home oven maxing out at 500F to 550F. If you have an outdoor pizza oven - whether propane-powered like an Ooni or Roccbox, or a traditional wood-fired setup - you are working with floor temperatures of 700F to 900F+ and bake times of 60 to 90 seconds. High hydration dough performs beautifully in these ovens because the intense heat converts all that extra water to steam almost instantly, producing explosive oven spring and heavy charring on the cornicione. The tradeoff is that you have almost no margin for error. A few seconds too long and you go from perfectly leoparded to burnt. Shaping also needs to be tighter since the dough spends less time setting up in the oven - any thin spots or tears will burn through before the rest of the pizza is done. If you are baking in a dedicated pizza oven, you can comfortably run 68% to 72% hydration for Neapolitan-style pies. In a home oven, that same dough benefits from the higher end of the range (70% to 75%) since the longer bake time gives the extra water more time to do its work.
Hydration Levels Beyond 70%: What Changes
Once you are comfortable at 70%, you may want to push higher. Here is what to expect.
72% to 75%. This is where most serious home pizza makers end up settling. The crumb becomes even more open, the crust gets lighter, and the overall eating experience improves. The handling difficulty is noticeably harder than 70%, though. Bassinage becomes more important, and you may need an extra set of stretch-and-folds. Flour selection also becomes pickier - you really want 13%+ protein at this level.
75% to 80%. This is expert territory. The dough is extremely slack and requires confident, fast handling. Slap-and-fold technique is almost mandatory during mixing. You need a strong, high-protein flour (14%+) and a long cold ferment to make this dough manageable. Certain pizza styles, particularly Roman-style al taglio, traditionally use dough in this range.
80%+. At this point, you are more in the focaccia or ciabatta zone than traditional pizza. Some Sicilian and Detroit-style recipes push to or past 80%, but those styles are baked in oiled pans rather than launched freely, which makes the handling problem much more manageable. If you are interested in pan styles, the high hydration is a natural fit.
High Hydration Pan Styles: Detroit, Sicilian, and Al Taglio
If the idea of launching a 75% hydration dough off a peel makes you nervous, pan pizza is where high hydration gets to shine without the stress.
The fundamental advantage of pan styles is that the pan does the structural work for you. The dough does not need to hold its own shape during a launch - it just needs to fill the pan and rise. That means you can push hydration significantly higher than you would with a free-launched pie, and the forgiveness factor goes way up. If you are new to high hydration, starting with a pan style is honestly a smart move before graduating to round pies on a peel.
The role of oil. Pan pizzas are baked in generously oiled pans - typically 2 to 3 tablespoons of olive oil or a neutral oil coating the bottom and sides. The oil does three things. First, it prevents sticking (obviously). Second, it fries the bottom and edges of the dough during baking, creating that signature crispy, golden, almost crackery crust on the outside while the interior stays pillowy and light. Third, it helps the dough slide and spread in the pan during proofing, so you do not have to fight it into the corners.
The bake is more forgiving. Since the dough is insulated by the pan on the bottom and sides, it bakes more evenly and is less prone to burning than a free-launched pizza sitting directly on a screaming hot steel. You also have more time to work with - pan pizzas typically bake for 12 to 18 minutes at 500F to 550F, and the window between "not done" and "overdone" is much wider.
How the styles differ:
Detroit style (70% to 80% hydration). Detroit pizza is baked in a rectangular steel pan (traditionally a blue steel automotive parts tray, but Lloyd Pans makes the standard home version). The dough is high hydration and cold fermented, pressed into the oiled pan, and allowed to proof until it fills the corners. Cheese - specifically Wisconsin brick cheese, though low-moisture mozzarella works - goes all the way to the edges, creating those caramelized, crispy cheese edges (the frico) that define the style. Sauce goes on top in racing stripes after baking, not underneath the cheese. Hydration in the 75% to 80% range produces the light, focaccia-like crumb that Detroit is known for.
Sicilian style (70% to 80% hydration). Sicilian pizza (sfincione in its traditional form) uses a similar high hydration, oiled-pan approach but in a larger, thicker format. The dough is typically proofed longer and baked thicker than Detroit, producing a breadier, spongier crumb. Toppings vary, but the classic Sicilian uses tomato sauce, onions, anchovies, breadcrumbs, and caciocavallo cheese rather than mozzarella. American-style Sicilian is usually simpler - sauce and mozzarella on a thick, airy slab. The dough handling is almost identical to Detroit, just scaled up to a bigger pan.
Roman al taglio (75% to 85%+ hydration). This is the most extreme high hydration pan style and arguably the most rewarding. Al taglio ("by the cut") pizza is baked in large rectangular pans, and the dough is so wet and airy that the finished product almost looks like it is more air than bread. Hydration routinely hits 80% to 85%, sometimes higher. The dough requires extensive mixing (often in a stand mixer for 20+ minutes) and a long, multi-stage fermentation - usually a bulk ferment followed by a cold retard of 48 to 72 hours. The result is a crust with enormous, translucent air pockets and an incredibly light, crispy exterior. Al taglio is stretched into the oiled pan by hand with wet fingertips, dimpled like focaccia, and often parbaked (baked partway without toppings), then topped and finished later. It is more labor-intensive than Detroit or Sicilian, but the texture is unlike anything else.
General tips for pan styles at high hydration. Use a well-oiled pan and do not skimp - the oil is doing real work, not just preventing sticking. Let the dough proof in the pan at room temperature for 1 to 2 hours after pulling it from the fridge. If it springs back and will not fill the corners, walk away for 20 minutes and try again. Forcing it tears the gluten and creates dense spots. Preheat the oven with a steel or stone on the lowest rack to help cook the bottom through - a common complaint with pan pizza is a pale, doughy underside, and bottom heat solves that.
Troubleshooting High Hydration Dough
The dough never came together during mixing. Your flour probably cannot handle the hydration. Switch to a stronger flour with higher protein content, or reduce hydration to 67% to 68% and work your way up.
The dough spread out flat and never held its shape. Likely underfermented or the gluten was not sufficiently developed. Do an additional set of stretch-and-folds, and make sure your bulk ferment is long enough to see that 30% to 50% volume increase.
Huge bubbles on the surface but dense inside. This usually means the dough was overproofed. The gluten network expanded too far and could not hold the gas, so it collected in large surface bubbles while the interior collapsed. Reduce fermentation time or lower the yeast amount.
The dough stuck to the peel and folded during launch. Not enough semolina, or you took too long adding toppings. Build speed - top the pizza quickly and give the peel a test shake before committing to the launch.
The bottom was pale and soft. Your steel or stone was not hot enough. Extend the preheat time. A full hour at maximum temperature is not excessive for a pizza steel - it is necessary.
The crust was crispy but gummy inside. The pizza was underbaked. This happens more with high hydration dough because there is more moisture to drive off. Leave it in the oven an extra minute or two even if the top looks done.
The dough tastes bland. Increase your cold ferment time. 24 hours is good, but 48 hours produces dramatically more flavor. Also check your salt percentage - 2.5% to 3% is the standard range for pizza dough, and under-salting is a common beginner mistake.
Yeast Selection for High Hydration
This is a minor point that becomes less minor at high hydration.
Instant yeast (also called rapid-rise or bread machine yeast) is the easiest to use. It can be added directly to the flour without activation, and it is forgiving in terms of measuring small amounts. For cold fermented dough, you are using such tiny quantities (often under 1g) that instant yeast's reliability at low doses is a real advantage.
Active dry yeast works fine but should be dissolved in a small portion of the water first to confirm it is alive. Use about 25% more active dry yeast than instant (so if a recipe calls for 1g instant, use about 1.25g active dry). Fresh yeast (compressed cake yeast) is preferred by many professional pizzaiolos. It is more perishable but produces a slightly milder fermentation flavor. Use roughly 3x the weight of instant yeast if substituting.
Sourdough starter deserves its own conversation. Natural leavening and high hydration are a great pairing, but the fermentation timing is completely different from commercial yeast. A sourdough high hydration dough can take 6 to 12 hours at room temperature or 24 to 72 hours with cold retard, depending on the strength and temperature of your starter.
The Role of Salt
Salt is not just a flavoring agent. In high hydration dough, it plays a structural role.
Salt tightens the gluten network. It does this by neutralizing the negative electrical charges on gluten proteins, which allows them to bond more tightly. This is why you add salt after the autolyse - you want the gluten to develop loosely first (which happens faster without salt), and then tighten it up when you are ready.
At high hydration, this tightening effect is even more important. The extra water makes the gluten network slacker, and salt helps compensate. If you have ever wondered why your dough seems unusually slack and extensible, check whether you added enough salt. For pizza dough, 2.5% to 3% of flour weight is standard. I typically use 2.8%.
Matching High Hydration to Pizza Style
Not every pizza style benefits equally from high hydration. Here is a rough guide.
Neapolitan (70% to 72%). Traditional Neapolitan dough runs around 58% to 65%, but a slightly higher hydration produces a more blistered, lighter cornicione in a home oven where bake times are longer. Stick to the lower end of high hydration for this style.
New York style (63% to 68%). Classic New York dough is moderate hydration. You can push to 68% to 70% for a lighter crust, but going too high produces something that does not fold well and gets too airy for the NY profile.
Roman-style al taglio (75% to 85%). This is where high hydration really shines. Al taglio dough is meant to be extremely airy and light, baked in a pan, and cut with scissors. The high water content is essential to the style.
Detroit and Sicilian (70% to 80%). Pan styles handle high hydration beautifully because you do not have to free-launch the dough. The oiled pan does the work of containing the slack dough, and the high water content creates that signature fluffy interior.
Tavern/bar style (55% to 62%). This is the one style where high hydration is actively wrong. Tavern style wants a thin, cracker-like crust - the opposite of what high hydration produces.
Final Thoughts
Going from 60% to 70% hydration is not just a 10-point bump on a number. It is a fundamentally different experience - from mixing to shaping to baking. The dough behaves differently, the techniques change, and the results are in a different league.
Start at 70%, use a strong flour, autolyse properly, and cold ferment for at least 24 hours. Those four things alone will get you 80% of the way there. The rest is practice and paying attention to what your specific dough is telling you in your specific kitchen with your specific oven. Keep notes. Adjust one variable at a time. And do not panic when it sticks to your hands - that is just the price of admission.