If you moved to Colorado (or Utah, or New Mexico, or anywhere above about 3,500 feet) and your go-to pizza recipe suddenly started producing flat, pale, cardboard-textured crusts - your recipe didn't get worse. The physics changed.
Making pizza dough at high altitude means working against lower air pressure, bone-dry air, and a lower boiling point for water - three variables that gang up on your dough in ways that most sea-level recipes never account for.
The good news is that the fixes are straightforward once you understand what's actually happening. And once you dial things in, high altitude pizza can be better than what most sea-level bakers produce, because the adjustments push you toward stronger flour, higher hydration, and slower fermentation - all things that make for a more flavorful, better-textured crust even if you lived at sea level.
This guide covers the science, every adjustment you need to make, how those adjustments shift depending on your pizza style and oven type, and the troubleshooting fixes for when things still go sideways.
Why Altitude Changes Everything About Your Dough
Three physical factors shift when you bake above 3,500 feet, and they all work against a standard pizza dough recipe at the same time.
Lower Atmospheric Pressure
At sea level, the atmosphere pushes down on your dough at roughly 14.7 psi. At 5,000 feet (Denver's elevation), that drops to about 12.2 psi. At 8,500 feet (common for Colorado mountain towns), it's closer to 10.9 psi.
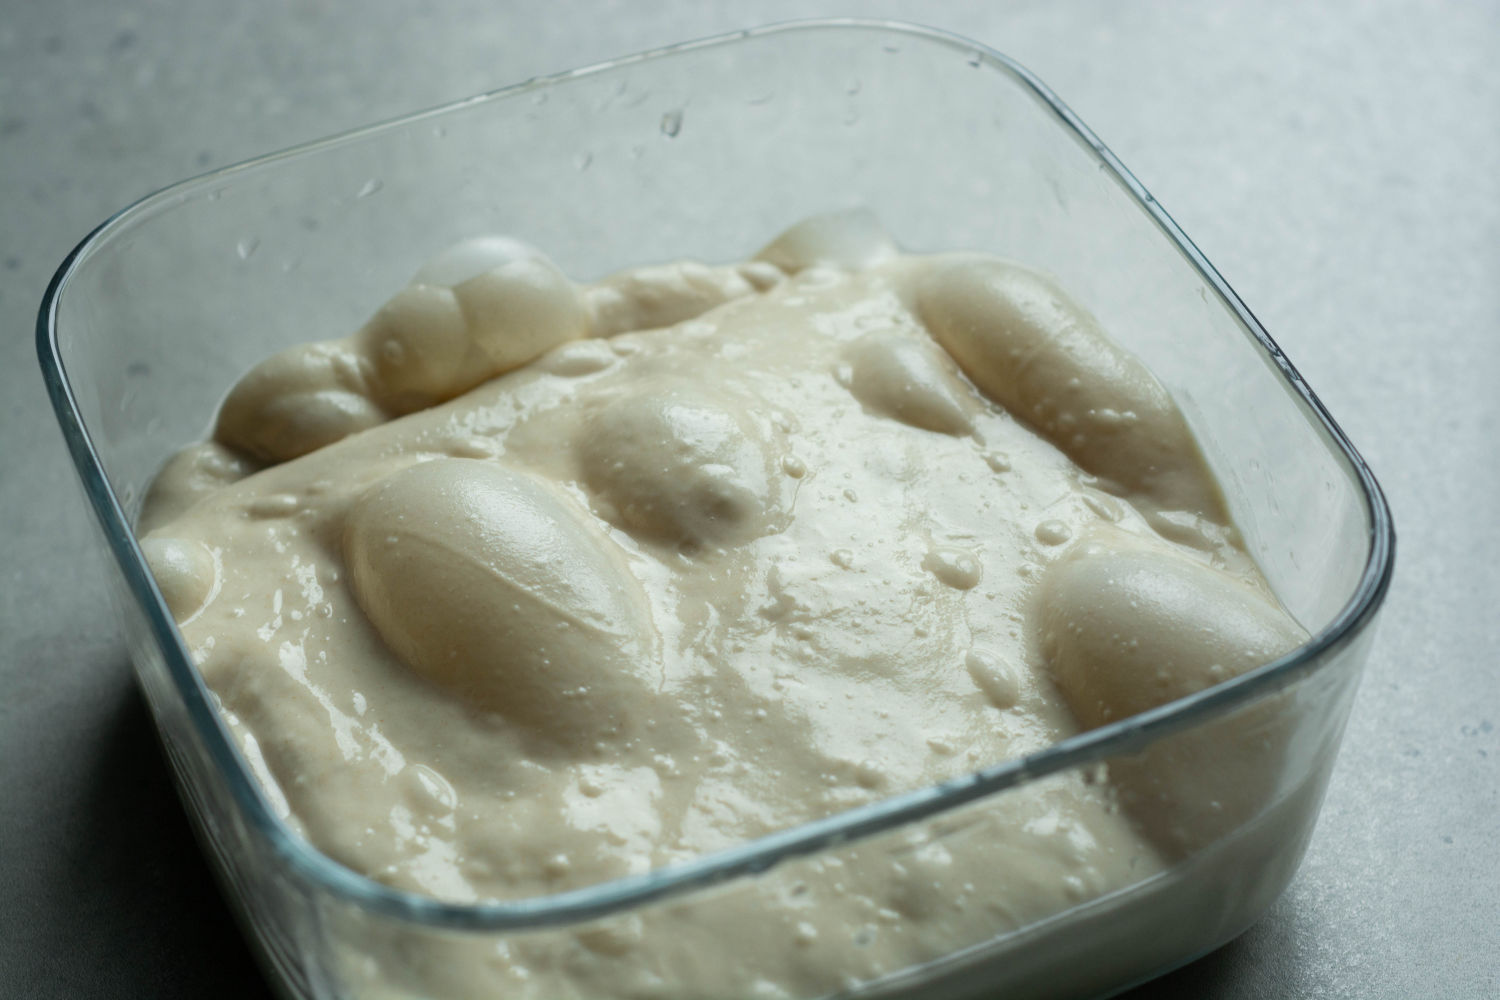
That might not sound dramatic, but that lower resistance has a big effect on how your dough ferments. Carbon dioxide bubbles produced during fermentation expand against whatever atmospheric pressure is pushing back on them. Less pressure means those bubbles grow faster and larger. Your dough proofs significantly faster than the same recipe would at sea level - sometimes 30 to 50 percent faster. If you're following a sea-level timing schedule, you'll overshoot the proof window without realizing it. The gluten network stretches past its limits, the bubble structure collapses, and you end up with a dense, gummy crust that never achieves proper oven spring.
This is the most important altitude effect to understand, because it cascades into everything else. The yeast aren't actually working faster - they're producing about the same amount of gas as they would at sea level, but that gas expands into bigger bubbles against less resistance, so the dough hits its target volume sooner. The catch is that it gets there in less time, which means the enzymes have had fewer hours to break starch into the simple sugars that fuel browning. It also means the gluten gets worked harder in a shorter window, which can leave you with a weaker structure going into the oven.
This is why "watch the dough, not the clock" becomes critical advice above 3,500 feet. A proofing schedule that works perfectly in Miami will overproof the same dough in Denver.
Dry Air and Flour Desiccation
Most high-altitude regions - especially across the Mountain West - are also very dry. Colorado's Front Range averages about 15 to 25 percent relative humidity for much of the year, dramatically lower than the 50 to 70 percent that's typical in coastal or midwestern cities.
That dry air affects your flour before you even open the bag. Flour stored in an arid climate loses ambient moisture over time. The same bag of bread flour that absorbs water easily in an Atlanta kitchen will act like a dry sponge in Colorado. A recipe calling for 63 percent hydration that produces a supple, workable dough in New York might feel stiff and chalky in Denver.
The result at bake time: a dry rim (cornicione), a tight crumb, and a crust that looks right but tastes like cardboard. If that description sounds familiar, dehydration is almost certainly part of the problem.
Lower Boiling Point
Water boils at 212°F (100°C) at sea level. At 5,000 feet, that drops to roughly 202°F. At 7,000 feet, it's around 198°F. At 8,500 feet, you're below 196°F.
For pizza, this matters during the bake. Moisture inside the dough vaporizes at a lower temperature, which means it flashes off faster. The crust dries out before the Maillard reaction (browning) has time to do its work. You end up either pale and soft (because you pulled it too early trying to avoid drying it out) or cracker-hard (because you left it in long enough to get color).
This is also why cold fermentation becomes even more valuable at altitude. The enzymatic activity during a long cold ferment breaks starches into simple sugars that brown at lower temperatures, partially compensating for the moisture loss problem.
The Four Adjustments That Actually Matter
Most high altitude baking advice is written for cakes and quick breads, where chemical leaveners are the main concern. Pizza dough is a different animal - yeast is the leavener, and the adjustments are about managing fermentation speed, gluten strength, and moisture balance.
Here are the four levers that make the biggest difference.
1. Use Stronger Flour
This is the adjustment that most high altitude pizza guides underemphasize, and it's arguably the most impactful structural fix.
At altitude, gas bubbles expand faster and push harder against the gluten network. If that network isn't strong enough to handle the extra stress, it tears. The bubbles collapse, and you're left with a flat, dense crust. The fix: use flour with more protein, which builds a stronger gluten network that can withstand the faster, more aggressive rise.
If you've been using all-purpose flour (10 to 11.5 percent protein), switch to bread flour (12.5 to 13.5 percent protein). If you've been using standard Italian 00 flour, consider Caputo Saccorosso (Red Bag) at 13 percent protein, or blend your 00 with some bread flour for extra backbone.
For a home oven at altitude, bread flour is almost always the better call anyway - it browns better at lower oven temperatures thanks to the malted barley most American bread flours contain. The best flour for pizza dough guide covers the full breakdown of protein content, the W-index, and which brands match which styles and oven types.
If you're pushing into long cold ferments (48 to 72 hours), the W-index (flour strength) matters even more at altitude. You need flour that can hold its structure over days while also resisting the faster gas expansion. King Arthur Bread Flour (12.7 percent protein, malted) is a reliable workhorse. If you want even more strength, King Arthur Sir Lancelot Hi-Gluten (14 percent protein) works, or you can add 1 to 2 percent vital wheat gluten to your bread flour.
2. Increase Your Hydration
Dry flour needs more water. This is the most intuitive fix, and it makes an immediate difference.
A recipe that works at 63 percent hydration at sea level will probably need 66 to 68 percent at altitude - sometimes more, depending on your local humidity and how long the flour has been sitting in your pantry. As a starting point, add 3 to 5 percentage points of hydration to whatever your baseline recipe calls for.
Denver-area pizza professionals confirm this. In a piece for 5280 Magazine, Luke Miller, executive chef at the Greenwich in Denver, noted that Neapolitan dough at altitude typically needs to run in the 70 to 75 percent hydration range - about 5 points higher than what's standard at sea level. Spencer White of Redeemer Pizza echoed the point, noting that wetter dough consistently produces better results at elevation.
Higher hydration also creates more steam during the bake, which helps offset the moisture loss from the lower boiling point. The tradeoff is that wetter dough is stickier and harder to handle - but that's a technique problem with technique solutions (better bench flour, semolina on the peel, working quickly).
Start at 65 percent and work up in 2 percent increments until you find your comfort zone. Handling dough above 65 percent takes some practice, but the payoff is worth it. The PizzaLogic dough calculator lets you adjust hydration and immediately see exact water amounts for your batch size. It also has a Climate setting that factors in your local humidity - choose "Dry (arid, desert, high altitude)" and it automatically adds a couple of percent to your hydration, so that part of the altitude adjustment is handled for you.
3. Reduce Your Yeast
Faster fermentation at altitude means you need less yeast. This is the most commonly cited altitude fix, and for good reason - it's the most direct way to slow things down so the gluten has time to develop properly and the enzymatic reactions that build flavor can keep pace with gas production.
For instant dry yeast (IDY), reduce the amount by about 20 to 30 percent from whatever a sea-level recipe calls for. If a recipe uses 0.3 percent IDY (relative to flour weight), drop to 0.2 to 0.25 percent. If you're doing a 72-hour cold ferment, you might go as low as 0.1 percent IDY.
King Arthur Baking's high altitude guide recommends reducing yeast by 25 percent at altitude and watching the dough rather than the clock. The Colorado State University Extension - the most authoritative research source on high altitude food preparation - makes the same recommendation specifically for yeast breads, noting that the shortened rise time at altitude interferes with flavor development.
The PizzaLogic calculator factors your elevation in too, trimming the yeast down as you go higher. It's a deliberately conservative adjustment - meant to move you in the right direction, not to replace your own judgment. Use it as a starting point and fine-tune from your actual bakes: if the dough is racing to the top of the container well ahead of schedule, pull the yeast back further than the calculator does.
At these small quantities, measuring accuracy matters a lot. A $15 jeweler's scale that reads to 0.01 grams is genuinely useful here - the two-scale setup explains why your kitchen scale alone can't reliably measure 0.6 grams of yeast.
Using active dry yeast (ADY) instead of instant? Multiply the IDY amount by 1.25. Using fresh cake yeast? Multiply by 3. The yeast guide covers all the conversions.
4. Maximize Your Oven Heat and Baking Surface
The lower boiling point at altitude means moisture escapes the dough faster during the bake. To compensate, you want the most intense, immediate heat transfer you can get - especially from below. The faster the bottom crust sets and springs, the less time moisture has to escape before the structure locks in.
A pizza steel is the best tool for this in a home oven. Steel conducts heat roughly 18 times faster than a ceramic pizza stone, which means faster bottom crust development and better oven spring. If you're baking at altitude in a standard home oven, a steel is close to a mandatory upgrade. The stone vs. steel comparison breaks down the differences in detail.
Preheat your steel or stone for a full 60 minutes at your oven's maximum temperature (usually 500 to 550°F). Position it on the upper third of the oven, about 4 to 6 inches below the broiler element. After launching the pizza, switch to high broil immediately - the direct radiant heat from above helps blister and brown the top before the crust dries out.
If you're using an outdoor pizza oven (Ooni, Gozney, etc.), the approach is different - and counterintuitive. More on that in the outdoor pizza ovens section below.
Quick Reference Table
| Adjustment | Sea Level Baseline | High Altitude (3,500 - 7,000+ ft) | Why |
|---|---|---|---|
| Flour protein | 10 - 12% (AP or standard 00) | 12.5 - 14% (bread flour or strong 00) | Stronger gluten withstands faster gas expansion |
| Hydration | 60 - 65% | 65 - 70% (sometimes higher) | Compensates for dry flour and faster moisture loss during bake |
| Yeast (IDY) | 0.3 - 0.5% | 0.2 - 0.35% (reduce ~20-30%) | Slows fermentation to prevent overproofing and gluten collapse |
| Room-temp bulk rise | 90 - 120 min | 30 - 60 min (reduce by ~30-50%) | Dough reaches target volume faster at altitude |
| Baking surface | Any | Preheated steel or stone, 60 min preheat | Maximizes conductive heat for fast oven spring before moisture escapes |
| Oven temp (home oven) | 450 - 500°F | 500 - 550°F (oven max) | Faster bake reduces moisture loss |
| Oven temp (pizza oven) | 800 - 900°F | 600 - 750°F | Prevents charring from rapid steam release at altitude |
| Browning insurance | Usually unnecessary | 1% diastatic malt or sugar | Replenishes browning fuel that yeast consumed during faster fermentation |
Altitude Bands: How Much to Adjust Based on Where You Live
Not all "high altitude" is the same. Someone baking in Denver at 5,280 feet faces different conditions than someone in Leadville at 10,152 feet. Here's a rough breakdown.
3,500 - 5,000 feet (Albuquerque, Salt Lake City, Boise) - The effects are real but moderate. Reduce yeast by about 15 to 20 percent. Add 2 to 3 percent hydration. Bread flour is recommended but not absolutely essential for short ferments. Most sea-level recipes will get you in the ballpark with these tweaks.
5,000 - 7,000 feet (Denver, Colorado Springs, Santa Fe, Reno) - This is where the adjustments become non-negotiable. Reduce yeast by 20 to 30 percent. Add 3 to 5 percent hydration. Bread flour should be your default. Room-temperature bulk fermentation should run noticeably shorter than sea-level timing. Cold fermentation becomes your best friend for flavor development without overproofing risk.
7,000 - 9,000 feet (many Colorado mountain towns, Flagstaff, parts of the Wasatch Range) - Significant adjustments across the board. Reduce yeast by 25 to 35 percent. Add 4 to 6 percent hydration. Use bread flour or high-gluten flour. Room-temperature fermentation windows get very tight - cold fermentation is strongly preferred. Watch your dough constantly during the final proof.
Above 9,000 feet (ski towns, mountain passes) - You're in advanced territory. Reduce yeast by 30 to 40 percent or more. Hydration might need to push to 70 percent or above. Strong bread flour is essential. Consider pre-ferments like poolish or biga to develop flavor without relying on a long bulk fermentation that's hard to control at this elevation. Every proofing step should happen in the fridge unless you're actively watching the dough.
These ranges are starting points. Your specific kitchen temperature, the humidity on a given day, and even the flour brand you're using will shift things. Adjust one variable at a time, take notes, and use the PizzaLogic dough calculator to keep your baker's percentages consistent between experiments.
Cold Fermentation: Your Best Friend at Altitude
If there's one technique that compensates for multiple altitude problems at once, it's cold fermentation. Putting your dough in the fridge (34 to 38°F) slows yeast activity dramatically - roughly six times slower than room temperature. At altitude, where everything ferments faster, this is exactly what you need.
A cold ferment gives you three specific altitude benefits:
It buys you time. Instead of fighting a compressed fermentation window at room temperature, you're stretching it out over 24 to 72 hours. The pressure differential at altitude still exists, but the yeast is moving slowly enough that it doesn't overwhelm the gluten network.
It builds browning fuel. Amylase enzymes break down starches into simple sugars during the cold rest. Those sugars are what power the Maillard reaction in the oven. At altitude, where moisture flashes off faster and can leave you with a pale crust, having more browning precursors available is a real advantage.
It makes the dough easier to stretch. Protease enzymes gradually relax the gluten during a long cold rest, making the dough more extensible and less elastic. This is helpful at any altitude, but it's especially useful when stronger flour is part of your equation - strong flour means snappier dough, and a cold ferment offsets that.
For a cold-fermented high altitude dough, use 0.1 to 0.2 percent IDY (for a 48- to 72-hour ferment), bread flour at 12.5 percent protein or higher, and 66 to 70 percent hydration. Keep the room-temperature bulk rise short - 30 to 60 minutes is plenty at altitude before the dough goes into the fridge.
One thing to be extra careful about: tempering. When you pull cold-fermented dough out of the fridge, it needs 2 to 4 hours at room temperature before baking. Cold dough going straight into a hot oven is a problem at any elevation, but at altitude it's worse - the rapid gas expansion from the heat hits a stiff, cold gluten network and you get uneven blowouts and the "measles" defect (dark blotches on an otherwise pale crust where gas escaped unevenly).
Same-Day Dough at Altitude
Same-day pizza dough at altitude is doable but requires more attention. The challenge is that both the bulk fermentation and the final proof happen at room temperature, where yeast activity is at its fastest - and at altitude, "fastest" is even faster.
Use cold water (55 to 60°F) to slow the initial fermentation. Reduce yeast by the full 25 to 30 percent. Keep total room-temperature fermentation time short - 45 to 75 minutes for the bulk rise, and 90 to 120 minutes for the final proof after balling. If your house runs warm, do the bulk ferment in the fridge for an hour or two before bringing the dough to room temperature for the final proof.
The tradeoff with same-day dough is always flavor. Shorter fermentation means less time for enzymes to build the sugars that drive browning and complexity. Adding 1 percent diastatic malt powder or 1 percent honey can help compensate - more on that below.
Pre-Ferments at Altitude
Poolish and biga are pre-ferments that develop flavor in a separate mixture of flour, water, and a small amount of yeast before you mix the final dough. They're a great tool at altitude because they let you build deep, complex flavor without putting the final dough through a long, hard-to-control fermentation.
The key altitude adjustment for pre-ferments: reduce the yeast in the pre-ferment itself by 15 to 20 percent. A poolish that ferments overnight at room temperature in a sea-level kitchen may be ready in 8 to 10 hours. At 5,000+ feet, the same poolish might peak in 6 to 7 hours. If you're not around to catch it, make the poolish with slightly less yeast and stash it in the fridge to slow things down.
Sourdough at Altitude
If you're using a sourdough starter instead of commercial yeast, the adjustment is simpler than you might expect. The Colorado State University Extension notes that sourdough starters aren't affected by altitude in quite the same way chemical leaveners are - the wild yeast and bacteria self-regulate to some extent.
That said, your starter will still ferment faster at altitude, so your bulk fermentation will be shorter. Use visual cues rather than timing: look for about 50 to 75 percent volume increase during bulk, and don't wait for a full double.
The bigger advantage of sourdough at altitude is that the acidity helps condition the gluten, making it more extensible. This partially offsets the snap-back problem that comes with using stronger flour. If you enjoy sourdough pizza and you're baking at altitude, it's a naturally compatible pairing.
The Autolyse Advantage at Altitude
If there's one mixing technique that becomes even more valuable at high altitude, it's the autolyse.
An autolyse is a rest period (typically 20 to 40 minutes) after you combine flour and water but before adding salt and yeast. During this rest, the flour fully hydrates and enzymes begin breaking down proteins, giving you a head start on gluten development without any kneading.
At altitude, this matters for two reasons. First, flour stored in dry mountain air is drier than flour at sea level, so it needs more time to fully absorb water. An autolyse ensures complete hydration before you start building structure. Second, the enzymatic activity during the autolyse improves extensibility - the dough's ability to stretch without snapping back. High-altitude dough made with high-protein bread flour can feel tight and elastic. The autolyse counteracts that, giving you a dough that's strong enough to handle fast gas expansion but relaxed enough to stretch into a pizza shape without fighting you.
For high altitude pizza, a 20 to 30 minute autolyse with just flour and water is the sweet spot. Mix until no dry flour remains, cover, and walk away. Add salt and yeast after the rest.
Browning Insurance: Diastatic Malt and Sugar
At altitude, yeast tends to consume available sugars faster (because fermentation runs faster overall). By the time the dough hits the oven, there may not be enough residual sugar to fuel the Maillard reaction - which is why high altitude pizza crust so often comes out pale and washed out, even when the timing and technique are otherwise solid.
Adding 1 percent diastatic malt powder (by flour weight) is the cleanest fix. Diastatic malt contains active amylase enzymes that continuously break starches into sugars during fermentation and even during the early stages of the bake. It's the same ingredient that makes American bread flour brown so well in home ovens, and it's especially valuable at altitude where the browning window is compressed.
If you don't have diastatic malt, 1 percent sugar or honey works too. It won't have the ongoing enzymatic effect, but it adds browning fuel directly. This is also why the beer in pizza dough trick works particularly well at altitude - the residual sugars in beer (especially darker styles) contribute to browning.
Note that this fix is primarily for home oven baking. In an outdoor pizza oven running at 700°F+, the intense radiant heat handles browning on its own regardless of residual sugar levels.
How Altitude Affects Different Pizza Styles
Not all pizza styles are equally sensitive to altitude. Here's how the major styles respond and what to prioritize for each.
New York Style
NY-style is actually one of the easier styles to adapt. It already calls for bread flour, moderate hydration (60 to 65 percent), and often a 24- to 48-hour cold ferment. At altitude, bump hydration to 65 to 68 percent, reduce yeast by 25 percent, and shorten any room-temperature bulk rise by about a third. The higher-protein flour handles the faster gas expansion well, and the cold ferment gives you the time-based flavor development that a quick room-temperature rise at altitude can't deliver.
Neapolitan
This is where things get trickier. Traditional Neapolitan dough uses softer 00 flour (12 to 12.5 percent protein) and relies on a very hot oven (800°F+) for a 60- to 90-second bake. At altitude, that softer gluten network is more vulnerable to the faster gas expansion. You have two options: switch to a stronger 00 like Caputo Saccorosso (13 percent protein, W 300+), or blend your standard 00 with 20 to 30 percent bread flour for extra backbone. Push hydration up to 68 to 72 percent.
If you're baking Neapolitan-style in an outdoor pizza oven at altitude, oven temperature management becomes critical - more on that in the outdoor ovens section.
Detroit and Sicilian (Pan Styles)
Pan pizzas at altitude are actually more forgiving than hand-stretched styles. The pan provides structural support during the rise, so the gluten network doesn't have to do as much work on its own. The Detroit style guide already calls for bread flour and high hydration (70 to 75 percent), which is close to what altitude demands anyway. The main adjustment is reducing the final proof time in the pan - watch for about 75 percent volume increase rather than full doubling, and don't walk away from it.
Thin Crust and Cracker Style
These styles are the least affected by altitude. They're rolled or pressed thin and don't rely on oven spring or a significant rise for their character. There's simply less gas in the dough to expand problematically. You might still reduce yeast slightly to avoid bubbling during baking, but the adjustments are minimal.
Outdoor Pizza Ovens at Altitude
If you're running an Ooni, Gozney, or any other high-heat outdoor pizza oven at altitude, you're dealing with the same dough challenges plus some oven-specific wrinkles - and the solution is counterintuitive.
At altitude, the lower boiling point means moisture in your dough vaporizes faster, which makes the crust spring more quickly and aggressively. That sounds like a good thing, but it creates problems. Brian Wilson, executive chef at Cart-Driver in Denver, explained to 5280 Magazine that at altitude, the lower boiling point causes the dough to spring up very fast - and the leopard spots burn before the rest of the crust cooks through. You end up with charred spots next to raw spots.
The fix most Denver pizza professionals recommend is to bake at a lower temperature than you would at sea level. Instead of cranking your Ooni to 900°F, try backing off to 700 to 750°F - or even 600°F, which is what Luke Miller at the Greenwich runs. The lower temperature gives you a wider margin for error and more time to manage the bake without charring.
This goes against the usual outdoor pizza oven advice of "hotter is better." At altitude, hotter means faster moisture loss, faster spring, and faster charring - all of which narrow your window for a good bake. A slightly lower temperature trades a few seconds of bake time for significantly more control.
Also worth considering: cold and windy conditions (common in mountain environments) can cool the exterior of your oven faster than it would in calmer settings. Keep the oven door closed as much as possible between pizzas, and give it extra recovery time between bakes. If you're cooking pizza on a grill at altitude, windscreens and lid management become even more important.
Stretching and Shaping at Altitude
High altitude dough can be trickier to stretch, for two reasons. First, if you're using stronger flour (as recommended), the gluten has more elastic snapback. Second, the faster fermentation can produce larger, more fragile gas bubbles that pop easily if you're aggressive with the stretch.
Give the dough extra rest before stretching. After you ball and proof, wait for the dough to fully relax. The poke test is your best indicator: press a lightly oiled finger into the dough about half an inch deep. If it springs back slowly and only about halfway, it's ready. If it snaps back quickly, give it more time.
Be gentle from the center outward. Push gas toward the rim rather than pressing it out of the dough entirely. High altitude dough has larger, more delicate bubbles - they're worth preserving, because they're what give you an airy, blistered crust.
If the dough keeps snapping back, it's either under-proofed, too cold, or needs more hydration. Cover it with a damp towel (or an inverted bowl) and let it rest for 15 minutes before trying again. Adding 1 to 2 percent more hydration to future batches can also help - more water relaxes gluten bonds and makes the dough more cooperative.
Workflow Adjustments at Altitude
You don't need a special process at altitude - you need the same process with a few timing and temperature changes. Here's what actually differs from a sea-level workflow, start to finish:
- Hydrate fully before building structure. Dry mountain flour takes longer to absorb water, so a 20 to 30 minute autolyse (flour and water only, before salt and yeast) is worth the wait.
- Cut the bulk rise short. Where a sea-level recipe might bulk for 90 to 120 minutes at room temperature, expect 30 to 60 minutes at altitude. Pull it at roughly 50 percent expansion, not a full double.
- Lean on the fridge. A 24 to 72 hour cold ferment is your main timing-control tool - it slows the fast altitude rise and builds the browning sugars you would otherwise lose.
- Watch the final proof, not the clock. It can run 2 to 3.5 hours depending on your kitchen. Ready is about 75 percent expansion and a slow, halfway spring-back from a gently poked finger. Overshoot it and the structure gets fragile.
- Temper cold dough fully. Give refrigerated dough 2 to 4 hours at room temperature before baking - cold dough hitting a hot oven at altitude blisters unevenly.
- Max out home-oven heat; back off outdoor-oven heat. In a home oven, preheat a steel 60 minutes at max and switch to high broil after launching. In an Ooni or Gozney, do the opposite of the usual advice and drop to 650 to 750°F so the crust does not char before it cooks through.
A Note on Water Quality
Many mountain communities have very soft water (low mineral content), while others have extremely hard water, depending on the source. Hard water tightens gluten and makes dough stiff. Soft water does the opposite - the dough can feel slack and hard to manage.
Colorado's Front Range tap water tends to be moderately soft, which is actually favorable for pizza dough. If you're on well water at elevation, mineral content can vary widely. If you're making all the right altitude adjustments and still getting inconsistent results, try a batch with filtered or bottled spring water. It eliminates one more variable.
Troubleshooting High Altitude Pizza Dough
Crust comes out pale and bland
The yeast consumed all available sugars before the bake. Add 1 percent diastatic malt powder or sugar to your recipe. Also confirm you're using enough heat - a fully preheated pizza steel at maximum oven temperature makes a big difference. American bread flour also browns better than unmalted Italian 00 flour in a home oven, which is directly relevant here.
Large, fragile bubbles that burst in the oven
The gluten network can't contain the gas pockets. Reduce yeast by another 10 percent, or switch to a higher-protein flour. You can also add 1 to 2 percent vital wheat gluten to your existing flour to strengthen the network. If it keeps happening, your dough may be over-proofing - watch the dough, not the clock.
Dough rises fast and then collapses
Classic over-proofing from too much yeast at altitude. Reduce your yeast, shorten your room-temperature fermentation window, and consider switching to a cold ferment where the fridge temperature gives you more control.
Dough feels tight and rubbery, snaps back when stretched
Either under-proofed dough or dough that hasn't fully relaxed. Give it more time at room temperature. If the problem persists across batches, add 2 to 3 percent more hydration. Using an autolyse during mixing improves extensibility significantly. Blending some 00 flour into your bread flour can also reduce elasticity.
Crust dries out and turns cracker-hard
Moisture is escaping too fast during the bake. Increase hydration by 2 to 3 percent, and make sure you're using the broiler trick (switch to high broil immediately after launching) so the top cooks before the interior dries out. A small amount of olive oil in the dough (1.5 to 2.5 percent) helps retain moisture during baking. Par-baking can also help for thick-crust styles, since it sets the structure before toppings add extra bake time.
Dense, gummy layer under the sauce (the "gum line")
Usually caused by wet toppings trapping moisture, combined with dough that was still cold in the center when it hit the oven. Make sure you temper cold-fermented dough for a full 2 to 4 hours before baking. Use less sauce than you think you need, and drain any wet toppings.
Dense, gummy interior with no oven spring
The dough rose too fast, collapsed, and then got locked into that collapsed state during baking. Reduce yeast. Use stronger flour. Shorten your room-temperature fermentation. And bake hotter - you need aggressive bottom heat (steel, not stone) to drive oven spring fast enough to re-inflate the structure before the crust sets.
Dough doesn't seem to rise at all
Less common at altitude (fast rising is the usual problem), but if your dough isn't rising, the issue is probably dead yeast or wrong water temperature rather than an altitude-specific problem. Check that your yeast is within its expiration date and that your water wasn't hot enough to kill it (above 120°F for instant dry yeast).
Colorado-Specific Notes
Since Colorado style pizza is a thing (however you feel about the branding debate), it's worth noting that the Beau Jo's "Mountain Pie" was designed specifically for high altitude baking conditions. The use of honey in the dough isn't just about flavor - honey is a humectant that retains moisture during baking, directly counteracting the faster moisture loss at elevation. The whole wheat flour in the blend adds density and chew that's more forgiving of altitude's structural challenges.
If you're baking on the Front Range (Denver, Fort Collins, Colorado Springs - roughly 5,000 to 6,500 feet), a yeast reduction of 20 to 25 percent and a hydration bump of 3 to 4 percent is a solid starting point. If you're up in the mountains (Breckenridge, Vail, Steamboat - 7,000 to 9,000+ feet), push those adjustments harder and rely almost entirely on cold fermentation for timing control.
Frequently Asked Questions
Can I use a sea-level recipe at high altitude if I just reduce the yeast? Reducing yeast is the most commonly cited single adjustment, and if you only make one change, it's the right one. But you'll get noticeably better results if you also bump hydration up a few percent and use stronger flour.
Do I need to adjust salt at altitude? No. Salt percentage doesn't need to change based on elevation. Keep it at 2.5 to 3.0 percent of flour weight. Salt does slow yeast activity, but its primary role is flavor and gluten structure, and those functions aren't affected by atmospheric pressure.
Does the PizzaLogic calculator account for altitude? Yes. It has an elevation input that automatically trims the yeast as you climb, and a Climate setting (choose "Dry (arid, desert, high altitude)") that raises hydration for dry mountain air. Both are deliberately conservative baselines - lean on the guidance in this post to push hydration a little higher or yeast a little lower if your own bakes call for it.
What about store-bought dough at high altitude? Pre-made dough from the grocery store is mixed and proofed at a facility that may or may not be at your elevation. If the dough was made at sea level and shipped to a mountain grocery store, it may overproof during transit or on your counter. Let it come to room temperature in the fridge (rather than on the counter) and watch it closely.
Making great high altitude pizza crust isn't about fighting the physics - it's about understanding the physics and adjusting for them. Stronger flour, more water, less yeast, and smarter oven management. Get those right and the rest follows.
Build your altitude-adjusted recipe in the PizzaLogic dough calculator to get exact ingredient amounts for your batch size and style.
Sources and Further Reading
- Colorado State University Extension - High-Elevation Food Preparation - The definitive academic reference on altitude-related food science adjustments, including yeast bread recommendations.
- King Arthur Baking - High-Altitude Baking Guide - Practical adjustment charts for leavened baked goods, with specific yeast bread recommendations.
- 5280 Magazine - High-Altitude Pizza Making Tips - Interviews with Denver pizza chefs on hydration, fermentation, and oven management at elevation.